How to Properly Install a Garage Door Opener (Expert Guide)

How to Properly Install a Garage Door Opener (Expert Guide)

Installing a garage door opener correctly is essential to ensure your safety and the functionality of your garage and with the right tools and instructions, you can easily complete this DIY project in just a few hours.

Once you’ve completed the installation, you’ll enjoy the convenience of a fully functioning garage door opener, giving you peace of mind and freeing up time for more important things in life. So why not take the first step towards a safer and more convenient garage by learning how to properly install a garage door opener today?

Pre-Installation Checklist

Make sure your garage ceiling is finished and dry
It is important to ensure your garage ceiling is finished and dry before installing a garage door opener. This is because installing a garage door opener involves drilling holes into the ceiling, and if the ceiling is not finished or is damp, it can cause the drywall or plaster to crumble and break apart. This can not only make the installation more difficult but can also create a safety hazard. If you are unsure about the condition of your garage ceiling, it’s best to consult with a professional before attempting to install the garage door opener. A professional can assess the condition of your ceiling and advise you on the best course of action to take to ensure a safe and successful installation.

Check the balance of the garage door

check the balance of your garage door, you have to lift the door three to four feet off the ground and release the door. if your garage door is properly balanced your garage door should be closed smoothly if your garage door is out of balance, you will see that it will be slammed on the floor. To probably balance your garage door you can check out our blog on balancing garage doors in easy and safe steps.

Measure the height of your garage door

It’s important to measure the door height because most garage openers are provided with a rail designed for a seven-foot, and up to Ten feet tall garage doors, otherwise, you need to buy a rail extension kit.

It’s important to note that this guide is for demonstration purposes only and these specific steps may vary slightly depending on the manufacturer’s instructions for your particular garage door opener. Always consult the manufacturer’s instructions manual if you found parts missing or not mentioned and follow them carefully to ensure a safe and successful installation. If you lost your manufacturer’s manual please contact your local contractor.

Your Pre-installation checklist is complete. Make sure to close your garage door afterward.

Install A Chain Or Belt Garage Door Opener Steps

Time

4 Hours

Tools

Screwdriver
Hammer
Tape Measure
Crescent wrench 7/16
Socket wrench 1/2 | 7/16 | 9/16 | 1/4
Stepladder
Drill 5/16 | 3/16 | 5/32
Hand saw
Pencil

Supplies

Perforated angle bracket
Light bulbs
3 to 6 screws

Prepare the opener

Prepare the LiftMaster or Chamberlain Opener

Put your garage door opener on the floor about 10 feet away from the garage door
The minimum required distance between your garage door and your opener to operate correctly is equal to the highest of your garage door. Without proper spacing, a garage door will not fully open when you complete installation.

Prepare the Genie Opener

Unbox your opener and check for the following list of componets:
Motor, Drive mechanism: Belt or chain, The Trolley, Rails, Tool Kit, bolts, rings and nuts, hanging brackets, Remote control, Keypad, Backup-Battery: It may or may not be included depending on your opener model, Wall-mounted control, Safety sensors: It may or may not be included depending on your opener model, Emergency release, And most importantly your Manual Instuctions.

Assemble the Rail Sections

LiftMaster & Chamberlain Opener Rail Sections Assembly

Start by unpacking the rail sections and laying them out between your opener and garage door.

Start from your garage door to insert the untapered end of the first rail section into the end of the second rail section. The two sections should have a snug fit.

Slide the two tapered ends of the sections together some openers come with bolts and nuts to secure the two sections together.

Continue to add all other included rail sections.

Once all rail sections are securely fastened together, slide the trolley assembly to the motor direction end of the rail. release lever should be toward the motor direction.

chamberlain opener trolley assembly

Install the stop bolts in the first rail section that closest to the motor.
opener stop nut & bolt in the rail section
Put the U-Bracket to the motor end of the rail and tighten the bolts.

Chamberlain opener U-BracketGarage door opener U-Bracket Installed to the rail section

Attach the rail from the U-Bracket end to the motor unit of the garage door opener by removing the bolts from the opener with your proper size socket wrench and hand-tighten the bolts.

Make sure the rail is level and securely attached to the motor unit but don’t over-tighten the bolts or use power tools.

For Chain Opener Attach Chain Spreader to the motor with the included screws.

chain spreader attached in chain opener jpg How to Properly Install a Garage Door Opener (Expert Guide)

Genie Opener Rail Sections Assembly

Assemble the RAIL Sections
Start with the first rail section that have a Caution stricker and tringle hole on it.

This Rail section is for your idel wheel and the one that facing your garage door.

Put your idel wheel in the tringle hole of the first rail section and secure it with the cotter pin.

Put the nut and bolt in the hole for the carriage stop, then Slide the carriage in the first rail section.

Continue to add all other included rail sections.

Slide the drive gear assembly. this drive gear will be slided down in the motor spline to move the belt.

Assemble the Belt or Chain

Assemble the Belt or Chain For Chamberlain & LiftMaster Openers

From the garage door start of your rail sections slide the belt or the chain cable and center position the Idler Pulley with the included hardware by the socket wrench.

idler pulley In the rail section with belt slides around

Make sure the Belt or Chain are around the Idler Pulley.

Use the screwdriver to cutout the rail tab to 90 deg angle.

opener rail section tab

Connect the belt to the trolley or chain to the trolley using the clip-type master link.

Insert the screwdriver into the second hole of the motor end of the rail section.

Extend the other side of the Belt or Chain until the trolley rest agenist the screwdriver.

For Chain Opener extend the chain and wrap it around the sprocket on the opener.

For Belt Opener Hook the belt into the trolley and wrap it around the sprocket on the opener, then install the Sprocket Cover.

Make sure the belt or chain teeth are facing the sprocket.

Connect the belt or chain with the master link hardware.

Connect the belt or chain through the threaded shaft with the master link hardware.

Assemble the belt for Genie Openers

Your Genie garage door opener belt should have a two sides one is silver and the other is gold.

Put the gold side through the idel wheel and the carriage.

Make sure the belt teeth facing the idel wheel.

connect the Turnbuckle on the both belt sides ( Silver & Gold ).

Make sure to put Turnbuckle side that it says DOOR To the gold side of the belt.

Tighten it untill your belt get the proper tension. As Manual Instuctions, Don’t over tighten the belt but you should get about a quarter inch slack on the opside side of the belt.

Tighten up the silver & gold side nuts using your adjustable wrench.

Now slide down the drive gear to the motor spline under your motor and tighten the 4 screws, two for the drive gear and 2 beside each side of the belt. Don’t Use A Power Tool, Use a socket wrench insteed.


Attach the spring trolley nut for the belt or inner nut and lock washer for the chain ( LiftMaster & Chamberlain Opener )

Belt openers come with a spring trolley nut that connects the belt to the opener release lever trolley but the chain opener instead of the spring trolley nut comes with an inner nut and lock washer.

Attaching the spring trolley nut for the belt opener

1- Slide the threaded shaft in the trolley hole of the release lever then attach the spring trolley nut to the threaded shaft.

2- Connect the belt to the threaded shaft using the other end of the master link hardware.

3- Use a screwdriver to push the nut ring against the trolley and with the wrench turn the spring nut until it releases the spring and snaps the nut ring to the trolley.

Attaching the inner nut and lock washer for the chain opener

1- Thread the inner nut and lock washer onto the threaded shaft.

2- Insert the threaded shaft through the hole in the trolley then Slide the outer nut onto the threaded shaft, threading it onto the shaft until it is finger-tight.

3-Use a wrench to tighten the outer nut firmly onto the shaft, ensuring it is snugly secured.

4- As manual instructions, Tighten the outer nut to tighten the chain until it is only one-quarter inch from the base on the rail

Place the header brackets

Note: As the manual suggests if you already had a header bracket in place you can use it.

Header Bracket

The first step in opener installation that our technicians at aaa Garage Door inc do is by installing the header brackets. which is the most important step because the header brackets are responsible to provide stability for the opener end of the rail, header brackets also help to ensure that the opener is installed at the proper height and angle above your garage door system for optimal performance. This is important because if the opener is installed too low or at the wrong angle, it can cause the door to operate improperly or even damage the door or opener.

Placing header brackets Steps
Get your stepladder.

Put a mark at the wall to the highest point that the first panel of the garage door reaches.

Close your garage door and above this mark by a minimum of 2 inches start placing the header brackets by making holes in the pilot holes using your drill.

install the garage door header bracket

Install the header brackets using the provided bolts with the proper size Socket Wrench.

Place the opener rail in the header brackets

Connect your garage door opener rail into the header brackets with the provided bolts or clevis pin. Note: Garage door springs should not be in touch with the header brackets or the opener rail.

garage door header bracket and rail installed

Opener Hanging

Start hanging the opener in ceiling you need to prepare the perforated angle brackets (Hanging brackets & Support brackets ).

The support perforated angle support bracket will be installed in your ceiling

The hanging perforated angle brackets typically be included with the garage door opener package and will be used to hang the opener in the support bracket.

Install the support perforated angle brackets

Mark the location of the screw holes on the garage ceiling, and then use a drill to create pilot holes. Attach the support brackets using screws and bolts.

An expert technique that our technicians follow is when installing a garage door opener, it is generally recommended to install the support brackets to hang the opener on a place of studs for optimal support and stability.

In case of these studs are not exposed due to the garage door being enclosed with the Ceiling Drywall, so we use the studs finder device which is a device that helps to locate the studs using electronic sensors or magnets.

Install the hanging perforated angle brackets

Measure the distance between the support perforated angle brackets and the opener.


Open your garage door and put a wood piece under the opener rail, while the opener is mounted on your garage door you need to measure the proper distance between the support brackets and the opener.

Measure the hanging perforated angle brackets and cut to the measured distance.

Connect the hanging, support brackets and opener

Connect the hanging brackets to the support brackets then connect the opener to the hanging brackets.

Remove the wooden piece under your garage door opener rail and close your garage door.

Finalize The Opener Hanging

Remove the wooden piece under your garage door opener rail.


Close your garage door.


Install the emergency release rope to the trolley. As Manual instructions, Make sure the emergency release rope is at least 6 feet off the ground.


Install the opener lightbulbs.

Installing the Garage Door Opener Arms ( Curved Arm & Straight Arm)

Disconnect the emergency release handle then Slide the trolley to the garage door.
In general, the Horizontal & vertical reinforcement brace should be already installed on your garage door.
If your garage door doesn’t have the operator reinforcement vertical brace please contact your contractor.

Installing the Curved Arm

If your door bracket is not already installed do the following
find the Door Bracket in your opener package.
Install the door bracket by using a drill to create pilot holes. As Manual instructions, The Door bracket should be centered under the header brackets.

Connect the Curved Arm to the Door Bracket with the provided bolt and ring. Pro Tip: Don’t attach your door bracket directly to your garage door. you have to make sure your door has an opener vertical reinforcement brace. This reinforcement brace works as force distribution to the pulling & pushing force of your opener to prevent dent or damage to your garage door panel over time.

Installing The Straight Arm

Connect the Straight Arm to the Trolley with the provided bolt and ring then connect the Straight Arm to the Curved Arm with the bolts and nut using the Socket wrench.

Programming The Down Travel Limits

Pull back the emergency release rope.

Open your garage door until the Trolley engages and clicks in place.

Opener That Has a UP/Down travel limit adjustment screw.

Do The Following
Locate the down travel limit adjustment screw on the garage door opener. This is typically located on the side or bottom of the opener motor.

Using a flathead screwdriver, turn the down travel limit screw clockwise to decrease the distance the door travels downwards, or counterclockwise to increase the distance.

Test the door by closing it and observing its travel. If the door stops at the desired location, the down travel limit is correctly set. If the door continues to travel downwards or stops too high, adjust the down travel limit screw accordingly and test again.

Opener That Have A UP/DOWN Limit Adjustment Buttons.

Do The Following
Close your garage door if it’s already open

Press and Hold the “Adjustment” button on the garage door opener until the UP Button Flashing.

Press and Hold the “Up” button on until the the door is fully opened to the desired location. Then Press & Relase the “Adjustment” Buton.

Press and Hold the “Down” button until the the door is fully closed to the desired location. Then Press & Relase the “Adjustment” Buton.

Press and RELASE the “Up” button until the the door is fully opened.
Press and RELASE the “Down” button until the the door is fully closed.


The travel limit is set correctly

Once the travel limit is set correctly, ensure that the safety features of the garage door opener, such as the Safety sensors and auto-reverse mechanism, are functioning properly to prevent accidents or damage. In the next steps, we will give you the steps in installing the safety reverse sensor then testing it.

Install the safety reverse sensors

Locate the sensor mounting brackets that came with your safety sensor kit. These brackets will be used to mount the sensors to the garage door track.

Position the mounting brackets on each side of the garage door track, approximately 6 inches above the floor.

Use a measuring tape to ensure that both brackets are at the same height.

Snap the brackets to the garage door track. Make sure that the brackets are firmly secured.

mount the safety sensors to the mounting brackets using the provided bolts. Ensure that the sensors are level and facing each other.

Connect the wires from the safety sensors to the garage door opener. Follow the manual instructions that came with your safety sensor kit to correctly route the safety sensor wires.

If these instructions are not enough you can read our full safety sensors installation steps and guide.

Testing the safety reverse sensors

Put an object in front of the sensors to check if they detect the obstruction and reverse the door’s motion.

If the safety sensors are working correctly, the garage door will stop and reverse its motion. If the safety sensors are not working correctly or led is flickering, adjust their position or angle until the led lighting is still.

As the Manual Instruction, The Safety Reverse sensors Must be tested every month or after any adjustments are made.

This Guide Is following the demonstrated Instructions for assembling and Installing a Belt/Chain Drive Garage Door Opener at the official Chamberlain Support & Genie Youtube Channel as well as the manufacturer’s Instructions Manuals.

AAA Garage Door Inc. Ready For Your Next Garage Door Installation

Our Pro-tips & techniques provided in the process are not present in the manufacture Instructions Manual but are reflected in our technician’s years of experience, which is only followed to enhance installation safety & reliability usage of the product and does not override the warranty guidelines. Feel Free to not use any of the included pro tips or techniques. Feel free to comment for any consideration to the installation process.

You found that this DIY project is not for you, so why not leave this to our professional technicians? if you are living in Miami Dade or Broward counties AAA Garage Door Inc. is here to help you with your garage door opener installation with the most professional services and including a service warranty to rest sure that our services are completely for your satisfaction. AAA Garage Door INC. Is your local LiftMaster authorized dealer in Miami which gives you the confidence of purchasing the needed opener for you and the proper professional installation. Call us now at 305-702-0113

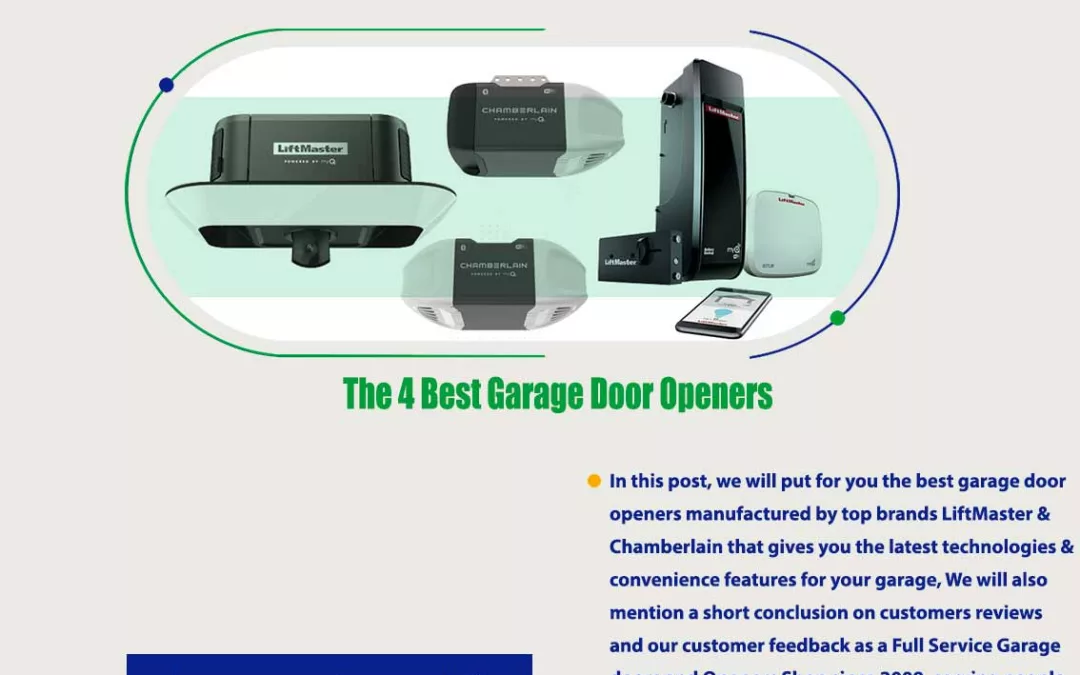
The 4 Best Garage Door Openers
The 4 Best Garage Door Openers
Chamberlain B2405
"> B2405 Chmberlain Opener The 4 Best Garage Door Openers
Best Overall
  • Features

    myQ App Connectivity

    start/stop smooth operation.

    Amazon Key In-Garage Delivery

    Security+ 2.0 technology

LiftMaster-87504
x87504 267 hero 1 The 4 Best Garage Door Openers
Best Smart Opener
  • Features

    HD Built-in Camera

    Battery Backup.

    Motion-detection lighting

    Soft start/stop smooth operation

    Work With Amazon Key

    myQ App Connectivity

LiftMaster 8500W
"> 8500W family 2 The 4 Best Garage Door Openers
Best Wall Mount Opener
  • Features

    Wall Mounted Design

    Automatic Garage Door Lock

    Battery Backup

    Amazon Key In-Garage Delivery

    Soft start/stop motor

    myQ App Connectivity

Chamberlain B2202
Chamberlain B2202 The 4 Best Garage Door Openers
Best Opener For Budget
  • Features

    Soft start/stop smooth operation

    Work With Amazon Key

    myQ App Connectivity

We use garage doors more than ever it become our main entry, working place, and even our personal gym due to their convenience and location.

According to Door and Access Systems, 71% of homeowners in the USA use their garage door opener to enter their home daily, which makes the average times that garage door goes up and down around 1,500 times a year. This makes the manufacturers of garage door openers invent new and innovative ways in order to add more Convenience, Durability, and also Security features during your high usage of your garage door, and this was done by introducing modern technology such as Rolling Code Technology Which named as Security+ 2.0 From LiftMaster Manufacture, intellicode security from Genie Manufacture and Installing devices such as 180Degree surveillance cameras, Safety Sensors, and Smart Garage kits.

All these Convenience & security features in order to make your garage more technology protected and safer at all times in a world full of security challenges. In this post, we will put for you the best garage door openers manufactured by top brands LiftMaster & Chamberlain that gives you the latest technologies & convenience features for your garage, We will also mention a short conclusion on customers reviews and our customer feedback as a Full Service Garage doors and Openers Shop since 2009, serving people of Miami-Dade & Broward Counties.

[ez-toc]

Benefits of Upgrading Your Garage Door Opener

        • Wifi Connectivity

      Upgrading your garage door opener is a great way to add convenience and security to your home. With new Wifi garage door openers, you can easily open and close your garage door with the press of a button. You can also enjoy features like remote access, which allows you to open and close the garage door from anywhere with a smartphone, and advanced security features, which help keep your home safe and secure.

        • Safety Sensors to protect your family

      One of the main reasons is Safety Sensors that work to prevent your garage door from closing while one of your family members or anyone is injured or harmed by accidentally stopping under your garage door while it closing.

        • Lighting for Your Garage

      Motion detection light sensor is so convenient for every homeowner that comes home late while everywhere around your garage is dark and needs to park your car or grab something from your garage quickly.

        • Energy Efficiency

      Another great benefit of upgrading your garage door opener is energy efficiency. Many of the newer models are designed to be energy efficient, which can help you save money on your energy bills.

        • Ultra-Quiet Operation

      With advancements in technology. many of the newer opener models are quieter than ever before. So you can enjoy the convenience of a garage door opener without the noise.


Types of Garage Door Openers

There are three main types of garage door openers:

Chain drive openers are the most common, and are the most affordable option, They are also great options for heavier doors.

Belt drive openers are quieter and more energy efficient than chain drive openers, but are more expensive.

Jackshaft openers: Uses a DC Motor which means the noise level difference is remarkable. Jackshaft mounts on the wall beside the door and uses pulleys and cables to open the door. They are quiet, convenient, low maintenance, security, and ease of installation. However, jackshaft types are less common because they are more expensive than other garage door openers.

Direct openers: Use a motor directly attached to the garage door by way of a J-arm with the stationary chain to move the garage door, they are known for their quietest operation longest lifespan, and least maintenance requirements but it don’t have a backup battery like other types.

Figure out about our liftmaster garage door openers features, models and complete your setup with LiftMaster accessories that add more convenience and control throughout your home.

Considerations When Buying a New Garage Door Opener

When purchasing a garage door opener, it’s important to consider the following:

    • Determine the opener type

you’ll want to determine the type of opener you need. Do you need a chain drive, belt drive, jackshaft, or direct drive opener?

    • Size of the Garage Door

You have to know that the standard height of a residential garage door is 7 feet and most garage door opener work with that height. If you have a garage door that is 8 or 9 feet tall it requires an extension kit so that your garage door opener will be able to handle the taller door.

    • Horsepower

Heavy doors are durable but it requires more powerful openers to be capable of lifting the door weight, so you need to know your garage door weight before deciding to buy your new opener. In general Wood, doors are the heaviest, and Fiberglass, and aluminum are lightweight.

    • Features

you’ll want to consider features like remote access, security features, and energy efficiency.

    • DC or AC Motor

DC and AC are two different types of garage door opener motors. DC (direct current) motors are known for their quiet operation and the smooth start and stop movements. They are more energy-efficient but do not have longer lifespans compared to AC (alternating current) motors. DC motors also tend to be more expensive initially but can save money in the long run due to their efficiency. On the other hand, AC motors are typically less expensive and can be found in many standard garage door opener models. They tend to be a little louder and have a more abrupt start and stop, but are still reliable, affordable, and efficient in most cases. Ultimately, the choice between a DC or AC motor will depend on your specific needs, such as budget, noise level, and performance requirements.

    • Budget

Determine your budget and make sure you’re getting the best value for your money.

We encourage you to check out our comprehensive article if you’re interested in learning more with a complete guide on buying a new garage door opener. In this article, you will find in-depth information about the different types of garage door openers, their features, and factors to consider when choosing the best opener for your needs.


Best Garage Door Openers

Now that you know the different types of garage door openers available, it’s time to take a look at the best Opener models.

Best Overall Chamberlain B2405
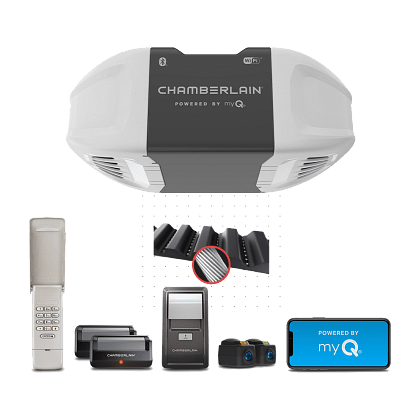
B2405 Chamberlain Opener
4.7 out of 5 stars

Chamberlain B2405 is a Smart myQ Smartphone Controlled Ultra-Quiet Belt opener. It is a budget-friendly option with a 1/2 HP motor that provides powerful and reliable performance. We choose this opener as the best overall because of its ability to have all-in-one homeowner’s basic needs and more, from its powerful motor that could handle lifting up to 350lbs garage door, therefore, it is a reasonably priced garage door opener and suitable for all residential steel garage doors. including all the other Smart, Wifi Connectivity and security features. Chamberlain B2405 is the most popular opener among all the Chamberlain openers with more than 4000 Ratings and 4.7 out of 5 stars on amazon.

Chamberlain B2405 Customer Reviews

Based on available customer reviews on Amazon, the Chamberlain B2405 opener is generally well-received, with users praising its easy installation, reliable performance, and convenient features such as reliability, smart features, and Reasonable price. Some customers have also been unpleased with the product, because of not having a backup battery.

Chamberlain B2405 Pros

Smart Features including voice control
Smartphone monitor & control myQ App
start/stop smooth operation
Amazon Key In-Garage Delivery

Security
Security+ 2.0 technology
Safety Sensors

Horsepower: 1/2Hp

Chamberlain B2405 Cons

No Battery Backup
AC Motor

Chamberlain B2405 Comes With

Motion-Detecting Wall Control
Wireless keypad
Safety sensor kit
Wall control panel


Best Smart Garage Door Opener With Camera LiftMaster 87504
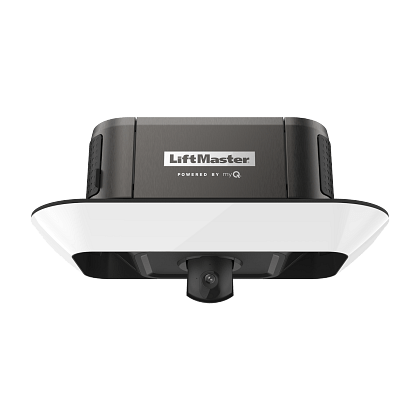
87504-267 LiftMaster opener
4.6 out of 5 stars 847 ratings

This Belt drive opener is one of the most convenient openers and top-of-the-line on the market. It features a quiet DC powerful motor and a variety of security features. With integrated wifi and myQ App, you can control, and monitor your garage anytime and anywhere. Additionally, it comes with HD Built-In Camera and 2-way audio communication.

LiftMaster 87504 Customer Reviews

87504 is available through the Authorized LiftMaster Dealers which makes the review search is a bit low but according to CNET Review, They found the Opener is overall exceptionally convenient with its Built-In Camera streaming with 1080p live video, 360-degree LED Lighting, durability, delightfully quiet and easy to install.

LiftMaster 87504 Reviews Based on LiftMaster Authorized Dealer Customers

Most of the customers were satisfied with the opener, With a 95% satisfaction rate Out Of 60 Customers (Buy & Installation).

Most Positive Reviews: LiftMaster 87504 is the most convenient opener, reliable, stylish, and provides the HP Needed for most residential garage doors.

Most Negative Reviews: it’s more expensive than other models of the same belt drive openers.

LiftMaster 87504 Pros

HD Built-in Camera
2-way Audio Communication
Battery Backup
Ultra-Quiet DC Motor
light ring 2,000 lumens of long-lasting LED light
Work With Amazon Key
myQ App Connectivity
Soft start/stop smooth operation
Motion-detection lighting

Security & Safety
Rolling Code: Yes | Security + 2.0
Safety Sensors: Yes

Horsepower: 3/4HP

LiftMaster 87504 Cons

Not budget friendly compared with other smart openers

LiftMaster 87504 Comes With

Battery Backup 485lm
880LMW Smart Control Panal
893Max 3button Remote control
877LM Wireless Keyless Entry System

LiftMaster 87504 Warranty

Motor & Belt Warranty: Lifetime
Parts Warranty: 5 Year

Interesting in buying LiftMaster 87504 Opener? Aaa Garage Door INC Is LiftMaster authorized dealer In Miami, Fl. We also provide professional installation for your new garage door opener. We’ve got you covered, Call us now for any further information at 305-702-0113.


Best Wall Mount Opener LiftMaster 8500W
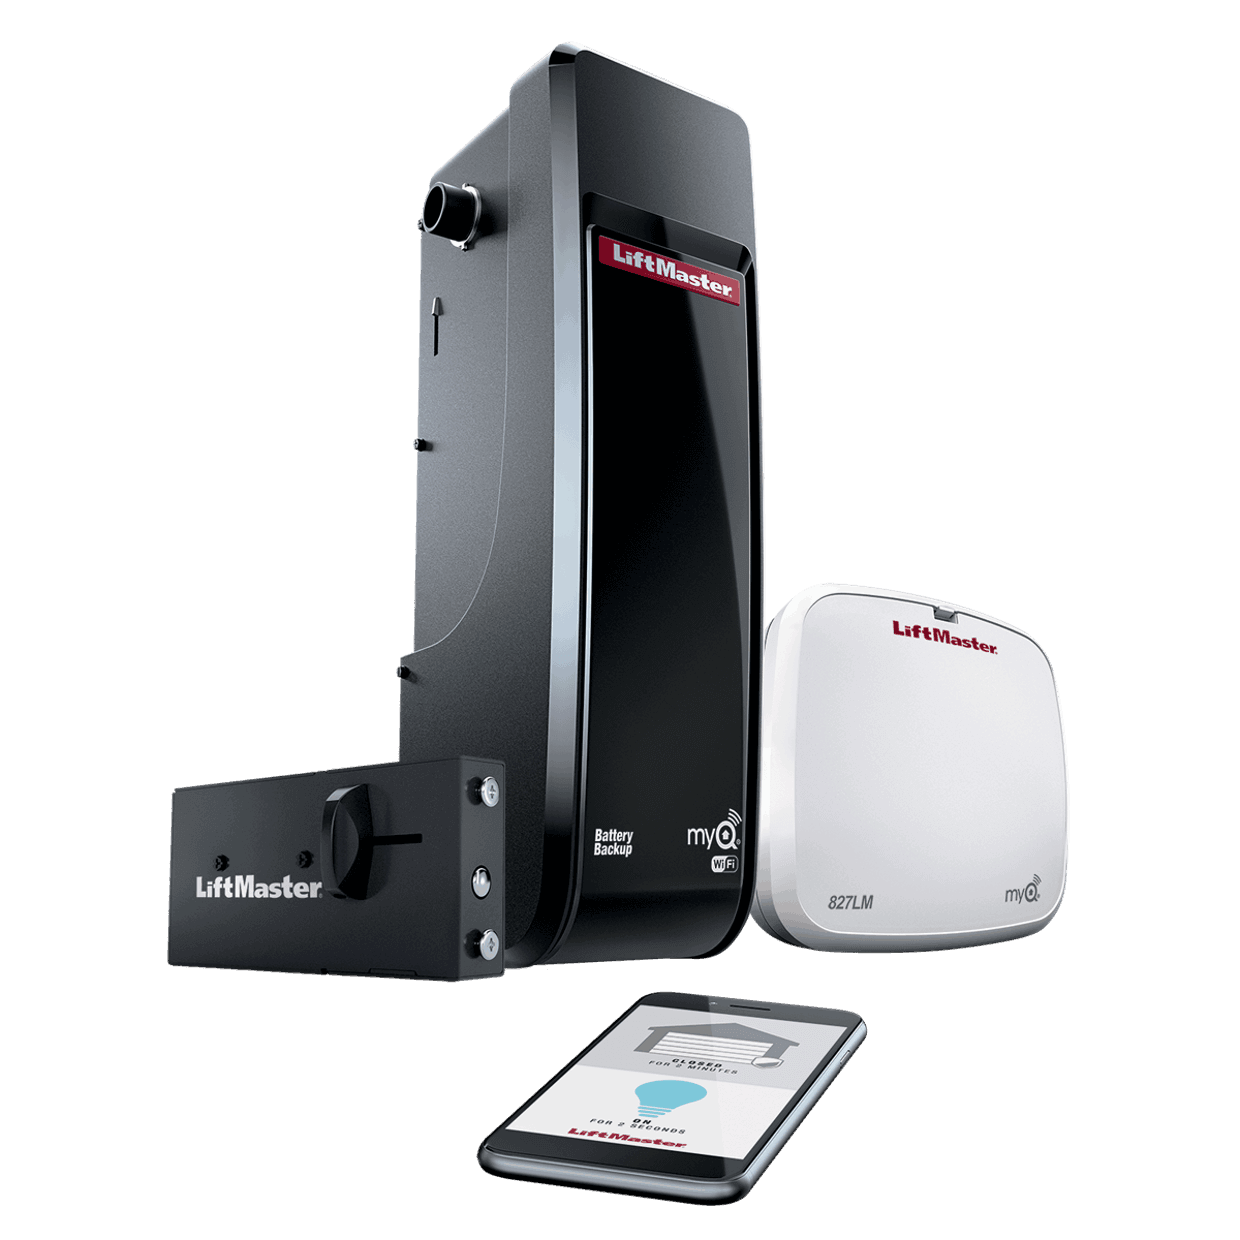
8500W_Wall mount opener
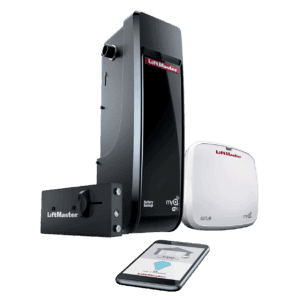
The LiftMaster 8500 – 8500W Elite Series is a wall-mounted design opener that frees up ceiling space, making it a good option for homes with low ceilings or limited headroom. 8500W opener is powered by a DC motor that provides ultra-quiet operation and includes a battery backup system that allows the door to be opened during power outages, unlike the 8500 Opener which doesn’t comes with a backup battery. Other features include built-in Wi-Fi for remote access and control via a MyQ app, and the ability to integrate with home automation systems such as Amazon Alexa and Google Assistant. additionally to all the safety and security features. The 8500W is capable to handle a garage door up to 850 lbs.

LiftMaster 8500W Customer Reviews

LiftMaster 8500W Achieved positive customer ratings of 4.6 out of 5 stars with 454 reviews On Amazon at the time the article was published. The short conclusion of these reviews was most of the customers were happy with the level of quietness and ease of handling and installation, Most of the negative reviews were caused by the buying experience from sellers on Amazon, as some customers did not find the desired after-sales services. So we always recommend that you find your Local LiftMaster Authorized Dealer to provide you with the best buying experience and else install your opener with professional and trained experts. Also worth mentioning is that other customers who were looking for an opener replacement complained about the special installation requirements.

8500W Opener Reviews Based on LiftMaster Authorized Dealer Customers

As a garage door services company and LiftMaster authorized dealer, we found that most of the customers were satisfied with the opener, With a satisfaction rate of 95% Out Of 80 Customers (Buy & Installation).

Most Positive Reviews: 8500w is quieter and less violent than the overhead styles additionally to all the smart features & stylish & modern look.

Most Negative Reviews: 8500w is a bit more expensive than the other same like models of direct drive openers.

LiftMaster 8500w Pros

Wall Mounted Design
Automatic Garage Door Lock
Built-in Wi-Fi
Battery Backup
Soft start/stop motor
Motion-activated LED Light
Timer to Close
Amazon Key In-Garage Delivery

Security & Safety
Rolling Code: Yes | Security + 2.0
Safety Sensors: Yes

Horsepower: 3/4 HP

LiftMaster 8500w cons

  • Not work for everyone looking for an opener replacement because of size/space requirements.

LiftMaster 8500W Warranty

5 years on Parts
Lifetime motor part warranty

LiftMaster 8500w Comes With

841LM Automatic Garage door lock
485LM Backup Battery
827LM myQ Remote Led Light


Best For Budget Chamberlain B2202
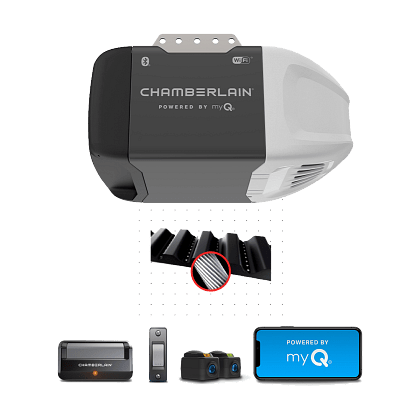
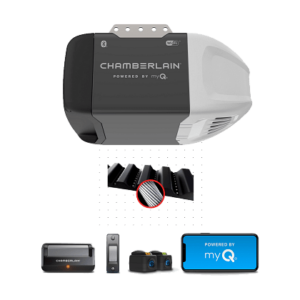
Chamberlain B2202
This belt drive opener is the most reliable and affordable opener on the market With an ultra-quiet AC Motor. It also has safety sensors, rolling code technology, and a variety of convenient smart features. The Chamberlain B2202 also has smartphone compatibility, allowing you to control your garage door from anywhere using the myQ app.

Chamberlain B2202 Pros

Soft start/stop smooth operation
myQ App Connectivity
Built-In Wi-Fi
Amazon Key In-Garage Delivery

Security & Safety
Rolling Code: Yes | Security + 2.0
Safety Sensors: Yes

Horsepower: 1/2 hp

Chamberlain B2202 Cons

No Backup Battery
Doesn’t Support Wireless Keypads
AC Motor

Chamberlain B2202 Warranty

6 years for motor
5-year for belt
1-year for parts and accessories

Chamberlain B2202 Comes With

1-button remotes
Push Button Door Control
Safety Sensors


It’s important to know that having a newer and modern garage door opener can make your life much easier. With the press of a button from anywhere, you can open or close your garage door and keep your garage monitored 24/7. But not all garage door openers are created equal. With advances in technology, there have been significant breakthroughs in the field, and today there is a wide range of garage door openers to choose from. In this article, we’ve taken a look at the benefits of upgrading your garage door opener, different types of garage door openers available, and reviews of the best garage door openers on the market. We hope this article has been helpful in helping you find the best garage door opener for your needs. So what are you waiting for? buy your best opener for your garage and give your home the convenience and security it deserves.

If you are living in Miami-Dade Or Broward counties, choose AAA Garage door inc Your local garage door opener authorized dealer For your New garage door opener purchase and installation. Call Us At 305-702-0113
aaa garage doors

Fix Garage Door Keypad that isn’t working

Fix Garage Door Keypad that isn’t working

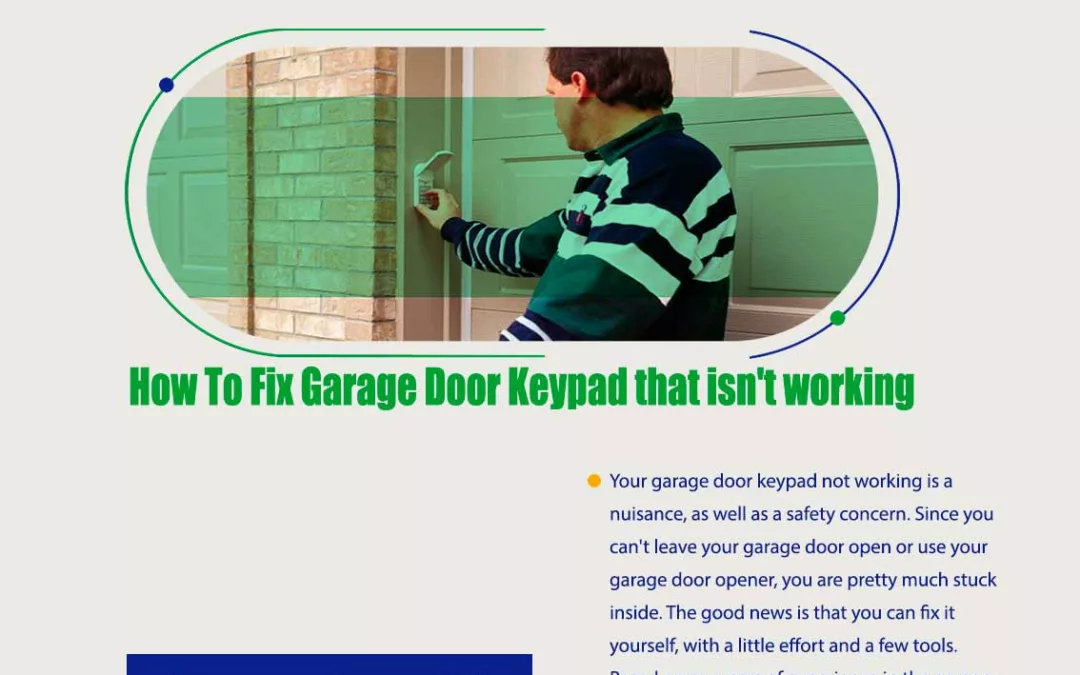
Your garage door keypad not working is a nuisance, as well as a safety concern. Since you can’t leave your garage door open or use your garage door opener, you are pretty much stuck inside. The good news is that you can your Fix Garage Door Keypad by yourself, with a little effort and a few tools. Based on my years of experience in the garage door repair business, these are the most common issues that you are likely to encounter, and how to fix them.


1- Garage door keypad battery checking

it’s also probably not just a matter of needing new batteries. but why not check if your keypad battery is already alive or dead? You can test it by opening it up and pressing one of the buttons. Most of these keypads are backlit, so pressing one of the buttons will light up behind, and if that number lights up, it’s probably a pretty good indication that it’s not the battery but if it does not light up so follow these steps to replace your garage door keypad battery.

1- Try to remove the keypad Battery cover by unscrewing the screw.
2- Remove the battery probably you will find that the electrode is snapped off or the battery just expired.
3- get a replacement for this battery with a new one
Time to try your keypad if it’s working now or not.


2- Reboot & Reset the garage door opener

if you replaced the battery but still your keypad doesn’t work so you probably need to reboot & reset the garage door opener. Garage door openers sometimes get stuck while working for long periods of time it’s not common to happen especially with new versions of openers but it is worth sometimes doing the most popular ways to fix issues. In another hand resetting your garage door opener will probably fix the signals that could possibly interfere with your opener and the keypad with other devices in your home because the connection between your garage door opener and the keypad is linked by a wireless connection or dual-frequency radio operates the keypad after you key in a personally selected four-digit pin. so resetting this connection could fix the issue

Steps to reboot & Reset the garage door opener
1. Unplug the garage door opener from the power outlet.
2. Wait a few seconds, then plug it back in.
3. Reseting your keypad pin may be different for each model but to do this, you will need to find the “learn” button on the opener itself. Once you have located this button, press and hold it for approximately six seconds. Next, enter a four-digit code of your choice on the keypad. Once you have done this, the opener should be reprogrammed and should start working again. You might need to read HOW TO PROGRAM YOUR GARAGE DOOR REMOTE CONTROL
4. Try using the garage door opener again.

Still lost and don’t know how to rest your garage door opener it’s okay we got you the most top opener brands explaining how to do it. Liftmaster, Genie.

3- Check for Frayed Wiring

if rebooting and resetting the garage door opener doesn’t fix the problem, then now we may have frayed wiring inside the keypad which causes the keys not to respond. so we should check the keypad from the inside by uncovering the back cover of the keypad then looking at any loose connections or damaged wires, then Inspecting the keys to make sure the wires are well-connected. if you found any wires are not connected or are damaged try to connect them properly. remember that this issue happens regularly as a result of wearing out or the weather conditions in your area.

4- Stuck keys

Perhaps some of the buttons are stuck or it is possible that they have been damaged over time, so you can verify that if it is correct by putting in a pin code completely different from the previous pin code, so if the garage door opens, then the keypad has damaged some of the buttons in it.

5- Replacement of your keypad

So if you’ve gone through all of those steps you’ve replaced the battery you’ve changed the passcode and you’ve relearned the keypad to the garage door opener and it still isn’t working then more than likely the keypad just is not good anymore and you’re going to have to replace it. Here are Some Best Keypad Replacement options for your Residential Garage Door Opener.


The good news is this is a pretty easy and cheap fix you can buy and replace it by yourself or call the professionals to diagnose and fix the problem. Hire AAA GARAGE DOOR INC. if you are a resident of Miami-Dade or Broward county for any issues with your keypad. We offer installation, maintenance, and repair services to our clients.

aaa garage door