by Adam | Aug 28, 2023 | Garage Door Opener
Garage door openers have come a long way from manual operation to automated systems that provide convenience, security, and efficiency. Two prominent types of garage door openers are AC (Alternating Current) and DC (Direct Current) openers. In this article, we will explore the characteristics, differences, and advantages of each type, and our recommended opener for each type, helping you make an informed decision for your garage door opener needs.
What Are DC Openers?
DC garage door openers operate using direct current. They are known for their energy efficiency, quieter operation, and smooth start and stop functions.
DC Garage Door Openers Advantages
DC motors have shafts, bearings, gears, and a gearbox in a small, lightweight chassis with a Circle Board that allows variable speed capabilities, enabling them to adjust the force required to operate the door based on size and weight. This helps in the smooth opening and closing of the garage door. DC Openers primarily work with a belt drive mechanism which makes them super quiet in operation and smooth, unlike the chain drive system.
- Belt Drive Quiet Operation
- Best For Residential Needs
- Soft Start/Close Feature
- Battery Backup
- Energy-Efficient
- Wall Mount Openers Designs

Our Recommended DC Openers
LiftMaster 84505R DC Opener

Opener Overview
Drive Type |
Belt |
AC / DC |
DC |
Battery Backup |
Yes |
Lights Turn On When Entering Garage |
Yes |
Security / Lock |
NO |
Smartphone Control |
Yes |
Soft Start / Stop |
Yes |
Timer To Close |
Yes |
Contact Us For This Product
The inclusion of a built-in camera in the opener offers the valuable addition of video and two-way audio communication capabilities within the myQ® app. This feature empowers users to exert comprehensive control, establish security measures, and maintain vigilant monitoring of their garage space, all conveniently accessible through the myQ app at any given time and from any location.
Enhancing both functionality and safety, the integrated LED lighting effectively illuminates your garage areas, boasting an impressive 1500 lumens of light output.
Complementing these features, the garage door opener employs an ultra-quiet DC motor and a robust belt drive mechanism, ensuring a harmonious coexistence with living spaces adjoining the garage.
Furthermore, the compatibility with Amazon Key introduces a new level of convenience and security by facilitating In-Garage Delivery of Amazon packages, with the added benefit of real-time monitoring of these deliveries.
The myQ app further solidifies its utility with the inclusion of myQ Diagnostics, a feature that provides real-time insights into the health of the opener through the Health Report function. In the event of issues or malfunctions, the app promptly alerts users with error codes and notifications, allowing them to seek professional assistance for services when necessary. This opener technology not only brings innovation to garage management but also ensures the seamless integration of smart technology into everyday life.
LiftMaster 8500W DC Opener

Drive Type |
Direct |
AC / DC |
DC |
Battery Backup |
Yes |
Lights Turn On When Entering Garage |
Yes |
Security / Lock |
Yes |
Smartphone Control |
Yes |
Soft Start / Stop |
Yes |
Timer To Close |
Yes |
Contact Us For This Product
- Wall-mount Design: One of the main of the key features of Liftmaster 8500w is the wall-mount design. Instead of being installed on the ceiling, the opener is mounted on the wall beside the garage door. This frees up overhead space in the garage, which can be particularly useful if you have limited headroom or if you want to maximize vertical storage space. Ultra-Quiet Operation: The 8500W is often praised for its quiet and smooth operation because of its belt drive DC motor, making it ideal for homes with living spaces adjacent to or above the garage.
- Wi-Fi Connectivity: This opener likely offers built-in Wi-Fi connectivity, allowing you to control and monitor your garage door remotely using a smartphone app. You can receive notifications about door status and open or close the door remotely.
- Battery Backup: In case of a power outage, the battery backup feature ensures that you can still operate your garage door. This is particularly useful if you need to access your garage during emergencies.
- Security Features: LiftMaster garage door openers typically come with advanced security features, such as rolling code technology, which helps prevent unauthorized access by changing the access code each time the door is used.
- MyQ Technology: LiftMaster’s MyQ technology allows you to integrate your garage door opener with smart home systems and devices. This might include compatibility with virtual assistants like Amazon Alexa or Google Assistant.
- Automatic Lock: The 8500W includes a powerful add-on accessory that works automatically with the opener to lock and unlock the garage door.
- Motion-Activated Lighting: Many modern garage door openers include motion-activated lighting, which illuminates the garage space when you enter.
- Compatibility with Different Garage Door Types: The LiftMaster 8500W is designed to work with a variety of garage door types, including sectional doors.
What Are AC Openers?
An AC (Alternating Current) garage door opener operates through a motor that receives a power voltage of 120V or 240V. When the opener is activated, the AC motor gets its power from the magnetic field generated through the coils wrapped around the output shaft drives a system of gears and pulleys to convert the electrical energy into mechanical motion. This motion is transferred to the garage door’s lifting mechanism, which raises or lowers the door.
AC Openers are commonly used for powering most commercial operators, from light-duty operators to heavy-duty operators.
AC Garage Door Openers Advantages
AC motors usually have a fixed speed, so they start and stop abruptly. The motor’s operation generates mechanical force to move the door, and while reliable, AC openers can be somewhat noisier compared to DC counterparts. They are known for their simplicity, sturdiness, and affordability, making them a traditional choice for some residential garage doors and a standard solution for commercial needs.
- More Powerful Openers
- Best For Commerical Solutions
- Most Affordable Option
- Higher Lift cycles
- More Reliable

Our Recommended AC Openers
Liftmaster 83650-267 AC Opener

½ HP AC Chain Drive Wi-Fi® Garage Door Opener with Integrated Bluetooth Technology.
Contact Us For This Product
- Built-in Wi-Fi® allows for smartphone control with the myQ® app.
Industrial-strength chain drive.
- Next-generation garage technology: improved Wi-Fi connectivity and enhanced memory to support new myQ features and solutions.
- Integrated Bluetooth technology: reduces setup time and makes it even easier to connect to the myQ app, other myQ devices, and smart home technology solutions.
- Works with Amazon Key: Enables convenient and secure In-Garage Delivery.
- myQ Diagnostics in the myQ app provides real-time insights for your garage door via the Health Report. Receive alerts and error codes in the app if an issue arises and connect with a professional for services if needed.
The Critical Difference Between AC & DC Garage Door Openers
- The main difference between AC and DC garage door openers lies in their motor characteristics.AC motors have a fixed speed, which means they start and stop abruptly. This sudden motion can sometimes cause stress on the garage door and the opener system but it’s ideal for commercial needs which need faster lift time regardless of the noise level
- DC motors, on the other hand, offer variable speed control and quiet operation, allowing for smoother and more controlled movements. Additionally, DC motors are often equipped with soft start and stop features, which reduce strain on the system and prolong its lifespan.
- Another significant difference is energy efficiency. DC motors are inherently more energy-efficient than AC motors.
- They consume less power during operation, resulting in lower electricity bills over time. This energy efficiency is particularly notable during standby periods when the garage door opener is not actively in use.
Which Is The Best: AC or DC Opener?
The decision between an AC and DC garage door opener ultimately depends on your specific needs and priorities. Here are some considerations to help you make the right choice:
Residential Or Commercial
(Depend On Your Needs)
Your first priority should be getting the right opener for your home or business that’s why consulting a garage door services company is the best way to make sure your investment is in the right place. Our company AAA Garage Door would be at your service in all garage door services whether residential or commercial serving Miami-Dade & Broward Counties for 15 years of expertise.
Noise Level
(DC Openers Wins)
If quiet operation is a priority, DC openers are the better choice due to their smooth start and stop functions and mainly work with a belt drive mechanism which is best for reducing the noise level.
Energy Efficiency
(DC Openers Wins)
DC openers are more energy-efficient, consuming less power during operation and standby. This can result in long-term cost savings.
Cost
(AC Openers Wins)
AC openers are often more affordable than DC openers, making them a budget-friendly option for some homeowners.
Power
(AC Openers Wins)
AC openers are often more powerful than DC openers and give the important factor of frequent operations which makes them suitable for commercial needs.
Maintenance Requirements
(AC Openers Wins)
AC openers need fewer maintenance requirements due to their build of durable components in their large chassis including the rotor and stator.
Conclusion
If you searching for which is the best AC or DC Opener There’s no one-size-fits-all answer. Both types have their advantages, and the choice should be based on your preferences, budget, and specific requirements. If you prioritize energy efficiency, smooth operation, and advanced features, a DC opener might be the better choice. However, if you’re looking for a more budget-friendly option and don’t mind the potential for more noise, an AC opener could be suitable. Consider your needs and always remember to consult with our professionals before making a buying decision.

by Adam | Jul 7, 2023 | Garage Door Opener, Safety Sensors
We count garage door safety sensors as one of the most important security components of a garage door system, it’s designed to ensure safety and functionality. Its primary function is to detect obstructions or obstacles in the path of the closing garage door.
How Does The Garage Door Sensor Work?
Let’s explain this first in a simple form, the garage door sensor operates through the transmission and reception of infrared or laser beams. By detecting interruptions in the beam, it safeguards against accidents by prompting the door to reverse its movement, thus protecting both property and individuals.
Typically, a garage door sensor consists of two main parts: the transmitter and the receiver. These components are usually mounted on the sides of the garage door, near the bottom. The transmitter emits an infrared beam or laser across the doorway to the receiver, creating an invisible infrared line.
When the garage door is opening and closing, the receiver continuously monitors the infrared beam. If the beam remains unbroken, indicating that there are no obstructions, the garage door will continue its normal closing process. However, if the beam is interrupted or broken, it signifies the presence of an object in the door’s path, and the sensor triggers a safety mechanism.
Upon detection of an obstruction, the sensor immediately sends a signal to the garage door opener, instructing it to reverse the door’s movement. This prevents the door from closing on the object or person and avoids potential accidents or damages. The reversal mechanism can either stop the door’s movement entirely or prompt it to open back up, depending on the specific design of the garage door system.
In addition to the primary safety function, garage door sensors often have secondary features. Some models include a smart beam obstruction indicator, which alerts you with a notification sent to your phone if the sensor is interrupted, misaligned or the door reversed. This feature helps ensure the sensor functions correctly all the time and maintains optimal safety conditions to help monitor your door operations.
Where is the garage door safety sensor?
The garage door safety sensor is typically located near the bottom of the garage door tracks or at the wall beside the tracks, on both sides of the doorway.

Garage Door Sensors Receiver & Transmitter
To be more specific, according to Door & Access Systems Manufacturers Association (DASMA), garage door safety sensors should be installed no more than six inches above the floor. One sensor, known as the transmitter with green led light, is mounted on the right side of the door, while the other sensor, called the receiver with amber led light, is positioned on the left side.

Transmitter Garage Door Sensor
Do you need safety sensors for the garage door?
Yes, garage door safety sensors are essential components for garage doors, and their installation is highly recommended for enhanced safety and accident prevention.
That being said, all states, including Florida, have recognized the importance of garage door safety sensors and have implemented regulations to ensure their use. The U.S. Federal Law UL 325 requires all garage doors to include safety mechanisms, such as garage door sensors and all
AAA Garage Door Inc. is Based in our beloved Sunshine Florida State so we know that Florida building codes have required residential garage doors equipped with garage door openers manufactured in and forward 1993 to have an approved safety system, which typically includes safety sensors. These safety sensors are required to be installed and functioning properly to comply with the regulations.
Ultimately, regardless of specific legal requirements, it is highly recommended to install safety sensors for garage doors as they significantly contribute to the overall safety of the system, preventing accidents and protecting both property and individuals.
How long do garage door safety sensors last?
Since our operation, we found that most of the time garage door sensors can last for 4 to 5 years of use, sometimes more than that which only requires repairs and not a total replacement.
Do I need to upgrade my garage door safety sensors?
Upon mistakes and learning from them, products get better and better in avoiding the mistakes or malfunctions that manufacturers know about it, and that maximizes your security so we recommend replacing your garage door sensor as soon as you find a newer version released because after each new version release but for affordability solutions sometimes it’s okay to stay with your current safety sensors.
How do you Install garage door sensors?
These are the simple steps you need to install your garage door safety sensors
- UNPLUG THE GARAGE DOOR OPENER
- LOCATE THE SENSOR MOUNTING BRACKETS
- POSITION THE MOUNTING BRACKETS
- ATTACH THE BRACKETS
- ATTACH THE SENSORS TO THE BRACKETS
- CONNECT THE WIRES
- TEST THE SAFETY SENSORS
- ADJUST THE SENSORS
For more detailed steps please read our article about installing garage door sensors.
Remember, these steps provide a general guideline, and it is crucial to refer to the specific instructions provided with your garage door sensor kit. Additionally, if you are unsure about any aspect of the installation process, it is always advisable to seek professional assistance from a garage door company.
Living in Miami-dade or Broward Counties Our qualified garage door technicians are always ready to help you just give us a call at 305-702-0113. AAA Garage Door Inc. Is ready to help you with your garage door sensors installation right away.
How do I test my garage door safety sensors?
- Clear the garage door area: Make sure the garage door area is free from any obstructions, objects, or debris that could interfere with the sensor’s operation.
- Check the sensor alignment: Visually inspect the sensors to ensure they are properly aligned. The transmitter and receiver units should face each other directly, and there should be no physical obstructions blocking the path between them. then make sure of these 2 points: Your Sensors Are Wired Correctly
Making sure of the wires is important before your first time testing your garage door sensors so make sure you followed the correct wiring instruction from your opener manual. If your sensors are correctly wired you will find that the sensors led lights is active and not blinking or has weak lights. Your Green Led Light Is Lighting Solid
If you see that the green led light is blinking that indicates that your transmitter unit is not probably aligned to the receiver unit. To align your garage door safety sensors correctly you need first to make sure your sensors are at the same height and six inches from the floor then move your receiver unit until you find your transmitter unit led lights
- Close the garage door: Use the garage door opener or the control panel to activate the closing function of the garage door.
- Interrupt the sensor beam: As the garage door is in the process of closing, deliberately interrupt the sensor beam by placing an object, such as a cardboard box or a broomstick, between the sensors. Ensure that the object is positioned at the same height as the sensor beam.
- Observe the garage door’s response: If the safety sensors are functioning correctly, the garage door should immediately stop its downward movement and reverse its direction upon detecting the obstruction. You should hear the beeping sound after the garage door reverses completely.
- Remove the obstruction: Once you have confirmed that the sensors are working, remove the object that was blocking the sensor beam.
- Test the sensors again: Repeat the process by closing the garage door and placing an object in the sensor’s path. Verify that the door reverses its movement as expected.
- Clean the sensors: Over time, dust, dirt, or debris may accumulate on the sensors, affecting their performance. Regularly clean the sensors with a soft cloth to maintain their effectiveness.
Regularly testing your garage door safety sensors, ideally, once a month, helps ensure the continued safety of your garage door system. If you notice any issues or if the sensors do not function as expected during the testing process, it is recommended to consult our professional garage door technician for further inspection and maintenance.
Can garage door sensors be reversed?
Yes, you can reverse the garage door sensors to be the receiver sensor on the right side of the door and the transmitter sensor on the left side of the door but it’s not recommended except in rare For example but not limited like where the Receiving sensor is exposed to direct sunlight so the sunlight interferes with the infrared beam emitted to the transmitter sensors which causes the sensors to not function all the time probably.

by Adam | May 6, 2023 | Safety Sensors, GarageDoor
It is important to ensure your garage door safety for the protection of you and your family. One way to enhance the safety of your garage door is by installing safety reverse sensors. Safety sensors are a component of garage door systems, as they prevent the door from closing on a person, animal, or object. In this article, Learn the steps to install garage door safety sensors and keep your family and belongings secure. And FAQ for after & before installation to know even more.
Tools To Install Garage Door Safety Reverse Sensors
To get started, we’ll tell you the basic tools you’ll need for the installation process. Equipped with the right tools, you’ll be ready to embark on this rewarding project. Then, we’ll guide you through each step of the installation, providing clear instructions and valuable tips along the way.
- Screwdriver
- Drill
- Measuring tape
Steps to Install Garage Door Safety Reverse Sensors
Now that you have gathered all the necessary tools, let’s proceed with the installation process.
Choice the right garage door safety sensors
The first thing you need to do is to know that you can’t get a different safety sensors brand than your opener and expect it to work because it’s simply manufactured only to work on their brand garage door opener.
Living in Miami-Dade Or Broward Counties call us now at 305-702-0113. We are a Liftmaster Miami Authorized Dealer We match the excellence of our products with exceptional services (Repair – Installation – Replacement). Premium quality Local garage doors in Miami-Dade & Broward Counties, FL.
Unplug the Garage Door Opener
The first step is to unplug the garage door opener. you need to have no power running to the opener while you wiring the safety sensors.
Locate the Sensor Mounting Brackets
Locate the sensor mounting brackets that came with your Liftmaster & Chamberlain Safety Sensors kit. These brackets will be used to mount the sensors to the garage door track. Genie T-beam Sensors They have built-in brackets so you cant mount it on the door track.


Position the Mounting Brackets
Chamberlain opener’s safety reverse sensors usually come with a hook to mount the brackets at the door track if so Hook the mounting brackets on each side of the garage door track, approximately 6 inches above the floor.
Attach the Brackets
Genie Opener Safety T-Beams sensors come with screws. Using a drill, attach the brackets to the wall beside each side of your garage door. Make sure that the brackets are firmly secured.
Attach the Sensors to the Brackets
Mount the reverse safety sensor using the wind nut & bolt. Ensure that the sensors are level and facing each other. A common practice our technicians do after measuring the 6 inches and mounting the brackets, we use a measuring tape to ensure that both brackets are at the same height.
Connect the Wires
Connect the wires from the safety sensors to the garage door opener. Follow the instructions that came in your opener manual to correctly connect the wires.
Wire safety sensors to a Chamberlain garage door opener
Genie Openers Manual
Test the Safety Sensors
Once you have connected the wires, plug in the garage door opener and test the safety sensors. put an object in front of the sensors to check if they detect the obstruction and reverse the door’s motion. If the safety sensors are working correctly, the garage door will reverse its motion and hear a beeping sound. if your door didn’t reverse or stopped from closing that means your safety sensors not working it will be a good idea if you check the alignment of your sensor or check the wiring.
Adjust the Sensors
If the safety sensors are not working correctly, adjust their position or angle until they are correctly detecting obstructions. if your safety sensors still not working then you should call your local Garage door company
Common questions about garage door safety sensors
How does a garage door safety sensor work?
Garage door safety sensors have what’s called a photo-eye. The sensors use an infrared light beam, similar to your TV remote or your night vision camera. typically they are mounted no more than six inches off the ground. These two sensors indicated as a receiver with a green LED and a sender with an Amber or Red LED help create an invisible line across your garage door that detects when something is in the way.
Will any sensor work with any garage door opener?
No, not all garage door safety sensors will work with any garage door opener. While safety sensors generally operate on the same principle of detecting obstructions and signaling the opener to reverse the door’s direction, compatibility between the sensors and the specific garage door opener is essential. For instance, if you have a LiftMaster opener, sensors from Genie will not work with it, and vice versa.
Each manufacturer designs their sensors to be compatible specifically with their own line of garage door openers. The wiring configurations, communication protocols, and overall compatibility may differ between brands, making it crucial to use sensors that are specifically designed for your particular garage door opener brand. But don’t forget that Chamberlain Group Is a Parent company of LiftMaster which allows it to use there technology and components between them and that makes the LiftMaster & Chamberlain Safety Sensors compatible with each other openers.
Are Garage Door Safety Sensors Required?
Yes, garage door safety sensors are required by federal law in the United States. The U.S. Consumer Product Safety Commission (CPSC) specifically 16 CFR Part 1211 has implemented regulations to ensure the safety of residential garage door systems. According to the CPSC’s guidelines, all newly manufactured or installed automatic garage door openers must be equipped with a functioning safety reversing mechanism, commonly known as safety sensors. It’s important to note that complying with federal regulations by installing garage door safety sensors is not only a legal requirement but also a responsible and proactive step in ensuring the safety of your household. By investing in this crucial safety feature, you can significantly reduce the risk of accidents and protect your loved ones and property.
What are Garage Door Safety Sensors?
Safety sensors are a pair of sensors that are mounted on each side of the garage door near the floor. The receiver sensor with an Amber or Red LED sensor sends a beam of infrared light to the sending sensor with a green LED, creating an invisible barrier. If an object, person, or animal crosses this barrier while the door is closing, the sensors detect the obstruction and reverse the door’s motion. This is an important safety feature that can help prevent accidents and injuries.
Do installing Garage Door Safety Sensors Need a Professional?
For the sake of effectiveness, Yes, installing garage door safety sensors should be done by a professional garage door technician. Installing safety sensors yourself can lead to mistakes because it needs some knowledge of electrical wiring and mechanical system, which can compromise the effectiveness of the sensors. But if you have enough knowledge and follow your manual instructions, Installing the sensor will be an easy task to do.
What makes garage door safety sensors fail?
Several factors can contribute to the failure of garage door safety sensors. Here are some common reasons why garage door safety sensors may fail:
- Wrong Installation: Garage Door Sensors are only installed in their manufacturer brand which means you can’t get a garage door sensor from a brand and install it in another opener band.
- Wiring issues: Faulty or damaged wiring can interfere with the proper functioning of the safety sensors. Loose connections, frayed wires, or wiring that have been chewed by rodents can disrupt the signal transmission between the sensors and the garage door opener. It’s recommended to first inspect the wiring if you have an electrical problem with the sensors.
- Dirty or obstructed sensors: Dust, dirt, spider webs, or other debris can accumulate on the sensor lenses over time, obstructing the infrared beam. This can lead to false readings or failure to detect obstacles. Regularly cleaning the sensor lenses with a soft cloth can help prevent this issue.
Remember, if you prefer the assistance of professionals to install your garage door sensors which is recommended, our skilled technicians at AAA Garage Door Inc. are just a phone call away. Simply click to call us at 305-702-0113 to schedule an appointment and experience the excellence that has made us a trusted name in the industry. Serving Miami-Dade & Broward Counties

by Adam | Apr 23, 2023 | Garage Door Opener
Garage door openers have come a long way in recent years. With the advent of smart home technology, you can now control your garage door opener using your smartphone. This article will explore the best apps for garage door openers that allow you to control your garage door from anywhere.
Apps To Control Your Garage Door From Anywhere
MyQ Garage & Access Control App

MyQ is one of the most popular apps for garage door openers available published by Chamberlain Manufacture. It is compatible with most major garage door opener brands with WI-FI, including LiftMaster, and Craftsman. Check if your garage door opener is compatible with MyQ. MyQ allows you to control your garage door opener from anywhere, check the status of your garage door, and receive alerts when your garage door opens or closes. MyQ App has always been our most favorite and interesting garage door opener app to config for our clients after every garage door opener installation job. We in fact encourage them to explore the convenient option and features it provides. The application guides you through all process from the first launch of the app until you complete the connection with your opener. if you need to know more about it, it has a support section that answers all your questions in a simple and easy way.
Download the free myQ App for iPhone and Android

Live View
You Can Remotely View Your garage door through the built-in Camera Or any other integrated camera to your garage door opener with Full HD Video Quality.
Remote Access
With the app, you can open and close your garage door from anywhere using your smartphone or tablet.
Real-Time Alerts
The app can send you real-time alerts when your garage door is opened or closed or motion detected, so you can monitor your garage door activity and stay informed about any unexpected events.
Scheduling
You can custom schedule your garage door to open or close at specific times using the app, which can be helpful if you need to let someone into your home while you’re away.
Integration with Voice Command Devices
The MyQ Garage Door Opener App can be integrated with other smart home devices, such as Amazon Alexa and Google Assistant, allowing you to control your garage door using voice commands.
Integration with Chamberlain myQ Smart Garage Hub

One of the best features of Chamberlain myQ products is the complete integration with each product and that’s including your New way of controlling your garage door through the Smart Garage Hub. It’s the easiest and most convenient way to link your garage door to your smart home.
Pros
- Smartphone Control
- Most stable performance compared to other apps
- Works With Alexa and Google Assistant
- Compatible With IFTTT Smart Automation and SmartThings
- Compatibility with Different Smart Products ( Cameras, Locks, Petportals and Smart Video Intercom)
- Security Features ( Temprory Key, Live Alert System, 1080p Live Streaming Video)
- Custom Owners Access Up to 5 Users
- Amazon Key
- Walmart+ InHome (NEW) Check for availability
- Best UI
Cons
- Video History Requires Subscription
Genie Aladdin Connect

The Genie Aladdin Connect app is compatible with Genie garage door openers. It allows you to control your garage door opener from anywhere and receive alerts when your garage door opens or closes. The app also features a virtual key option that allows you to give access to your garage to family members, friends, or service providers.
Download the free Aladdin Connect app for iPhone and Android

Garage Door Status
You can check whether your garage door is open or closed.
Remote Control
You can control your garage door for anyone such as a repair person, Family member, a friend without the need to have a temporary access password.
Usage History
Have a detailed history of when and who used your garage door opener.
Virtual keys
You can set-up up to 5 Virtual keys with time-based rules.
Pros
- Smartphone Control
- Supported By SmartThings
- Works With Alexa and Google Assistant
- Security Features ( Temprory Key and Live Alert System)
- Custom Access to Up 5 Users
- Walmart+ InHome Check for availability
- Connected to Wi-Fi RetroFit Kit: to connect your old Genie garage door opener with WI-Fi
- Connected with BenchSentry Porch Box Package
Cons
- No Amazon Key
- Not Supported By IFTTT
- No Live Streaming Video
GarageMax

If your garage door opener doesn’t have integrated Wi-Fi then it’s time to dive deep into the world of smart garage door controllers and first stop at GarageMax.
GarageMax (GarageMate) is a smart garage door opener app that extends your garage door opener’s ability to have a Wi-Fi connection to operate it remotely. It is compatible with most major garage door opener brands and allows you to control up to eight garage doors. GarageMate also features a geofencing option that automatically opens or closes your garage door when you enter or leave a specified area. Check For compatibility.
Easy Installation
GarageMate is easy to install and set up. The device comes with a well-illustrated installation guide that makes the installation process simple and straightforward.
Remote Access
With GarageMate, you can control your garage door remotely from anywhere using your smartphone. You can open and close your garage door, monitor its status, and receive notifications on your smartphone.
Multiple garage doors
GarageMate allows you to use multiple garage doors.
Guest Permissions
Control your garage door with your family, friends, or guests. You can give them temporary access or revoke access at any time.
Security
GarageMate provides an extra layer of security for your garage because it’s password protected and has a vacation mode that prevents others than you from opening the door while you are away.
Pros
Easy to install and use.
Free access to advanced features like video monitoring and smart notifications.
Sharing access and compatibility with multiple users.
Compatible with most garage door openers.
Cons
Some users have reported connectivity issues.
Not have as many advanced features as some competitors like voice command and video monitoring.
iSmartGate Access
iSmartGate is a smart garage door controller device that can be installed in your garage, and it allows you to control your garage door from your smartphone or other smart devices. It was developed by Gogogate INC. The iSmartGate device can be easily installed and connected to your home Wi-Fi network, and it works with most garage doors.
Remote Access
The iSmartGate app allows you to control your garage door from anywhere, anytime. This feature comes in handy when you forget to close the garage door while leaving the house, or you need to let someone in while you’re away.
Smart Notification
iSmartGate sends you notifications when your garage door is opened or closed. You can set up custom notifications to alert you when someone opens the garage door or when it’s left open for an extended period.
Voice Control
iSmartGate works with Amazon Alexa and Google Assistant, which means you can use voice commands to control your garage door.
Video Monitoring
iSmartGate comes with a video monitoring feature through an IP Camera that allows you to monitor your garage in real-time. You can view live footage from your smartphone or other smart devices.
Pros
3 doors with one device.
Free access to advanced features like video monitoring and smart notifications.
Voice control and compatibility with Amazon Alexa and Google Assistant.
Compatible with most garage door openers and gates, Check for compatibility.
Compatible with Apple HomeKit, Google Assistant, Amazon Alexa, Samsung SmartThings, and IFTTT.
Cons
Hard to install due to the lack of documentation.
May be expensive compared to some budget options.
Some users have reported connectivity issues.
Requires a stable Wi-Fi network to function properly.
What Are Garage Door Opener Apps?
Garage door opener apps are applications that allow you to control your garage door opener using your smartphone. These apps work by connecting your smartphone to your garage door opener through WI-FI. Gives you the ability to open and close your garage door from anywhere, make temporary guest access, schedule open and close times, and many more options we will discuss individually for each app.
How Does Garage Door Opener App Work?
Garage door opener apps work by connecting to your garage door opener’s control board. The control board is the brains of your garage door opener, and it is responsible for opening and closing your garage door. The app sends a signal to the control board, which activates the opener and opens or closes your garage door.
How do I connect my garage door opener to Wi-Fi?
There are two ways to do that the first one is to download the official opener app such as myQ or Genie Aladdin Connect which is only for openers that have built-in wifi or external garage door opener hub and the second one is the third-party smart garage door opener accessories that would provide this technology from there own device and app.
Conclusion
Garage door opener apps provide a convenient way to control your garage door from anywhere. The apps listed in this article are among the best apps for garage door openers available on the market. They offer a range of features that allow you to monitor and control your garage door with ease. In the end, We always advise our customers in Miami-Dade County Fl as our service area, who ask us for smart connection solutions or openers repair of outdated openers to upgrade their own garage door opener and use official apps for garage door openers like myQ & Aladdin Connect. Manufacturers like Chamberlain themselves suggest that if your garage door opener has exceeded the ten years lifespan, it is recommended that you replace your opener with a newer model that comes with this technology’s built-in, for example, MyQ Or Aladdin Connect Compablility, so you don’t need to purchase a third-party accessory.
In fact, upgrading the old and incompatible garage door opener is not a bad idea, the new models, have safety features like Rolling Code. They are also less expensive compared to all the smart garage door controllers available in the market. It also makes you assured that you are secured against all the security vulnerabilities that may occur in the smart garage door controllers such as the detected Vulnerabilities in Nexx products. released date April 04, 2023, and unstable applications that It does not provide the same benefits as official garage door openers Manufacturer applications. if you are convinced to upgrade your garage door opener, that’s a good choice now you can know the best garage door openers for your needs.

by Adam | Apr 16, 2023 | Garage Door Opener
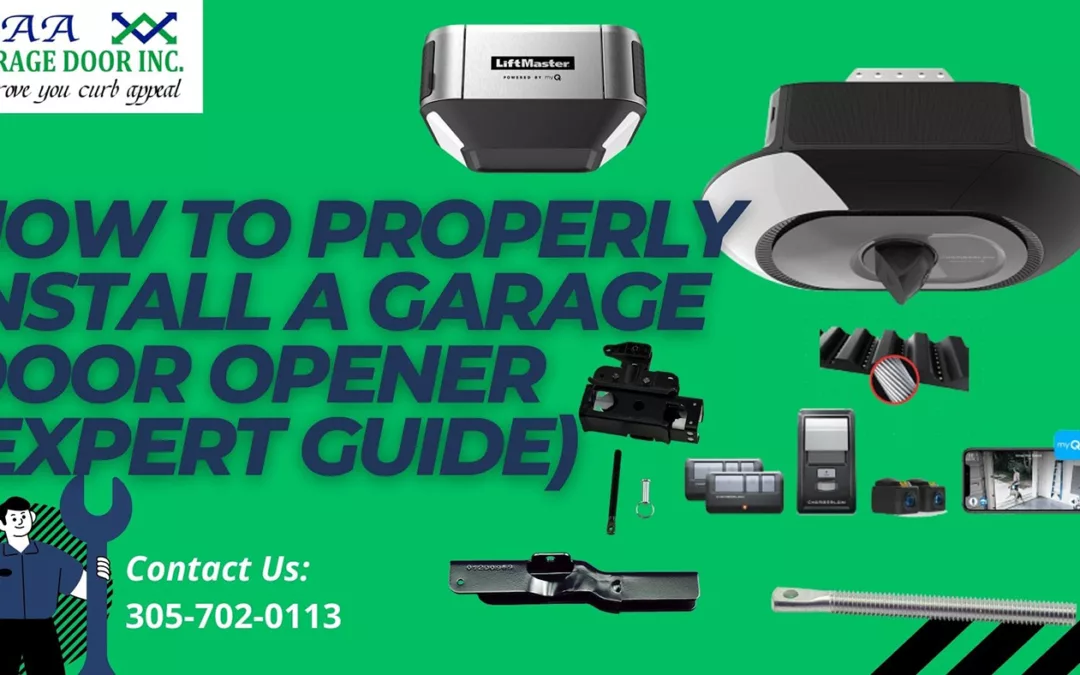
Installing a garage door opener correctly is essential to ensure your safety and the functionality of your garage and with the right tools and instructions, you can easily complete this DIY project in just a few hours.
Once you’ve completed the installation, you’ll enjoy the convenience of a fully functioning garage door opener, giving you peace of mind and freeing up time for more important things in life. So why not take the first step towards a safer and more convenient garage by learning how to properly install a garage door opener today?
Pre-Installation Checklist
Make sure your garage ceiling is finished and dry
It is important to ensure your garage ceiling is finished and dry before installing a garage door opener. This is because installing a garage door opener involves drilling holes into the ceiling, and if the ceiling is not finished or is damp, it can cause the drywall or plaster to crumble and break apart. This can not only make the installation more difficult but can also create a safety hazard. If you are unsure about the condition of your garage ceiling, it’s best to consult with a professional before attempting to install the garage door opener. A professional can assess the condition of your ceiling and advise you on the best course of action to take to ensure a safe and successful installation.
Check the balance of the garage door
check the balance of your garage door, you have to lift the door three to four feet off the ground and release the door. if your garage door is properly balanced your garage door should be closed smoothly if your garage door is out of balance, you will see that it will be slammed on the floor. To probably balance your garage door you can check out our blog on balancing garage doors in easy and safe steps.
Measure the height of your garage door
It’s important to measure the door height because most garage openers are provided with a rail designed for a seven-foot, and up to Ten feet tall garage doors, otherwise, you need to buy a rail extension kit.
It’s important to note that this guide is for demonstration purposes only and these specific steps may vary slightly depending on the manufacturer’s instructions for your particular garage door opener. Always consult the manufacturer’s instructions manual if you found parts missing or not mentioned and follow them carefully to ensure a safe and successful installation. If you lost your manufacturer’s manual please contact your local contractor.
Your Pre-installation checklist is complete. Make sure to close your garage door afterward.
Install A Chain Or Belt Garage Door Opener Steps
Supplies
Perforated angle bracket
Light bulbs
3 to 6 screws
Prepare the opener
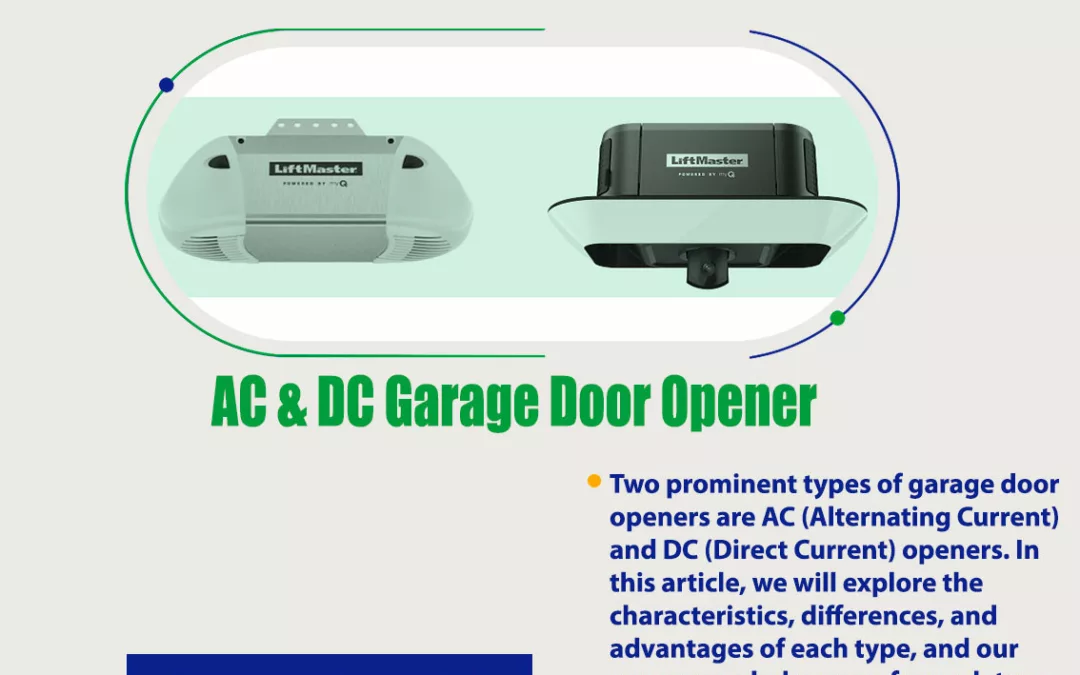
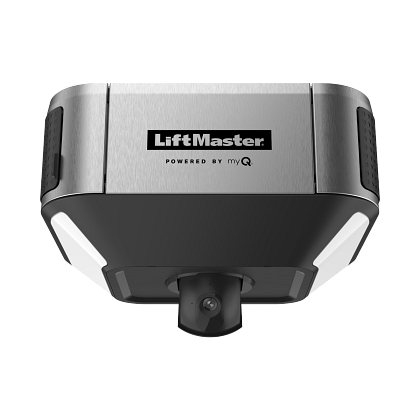
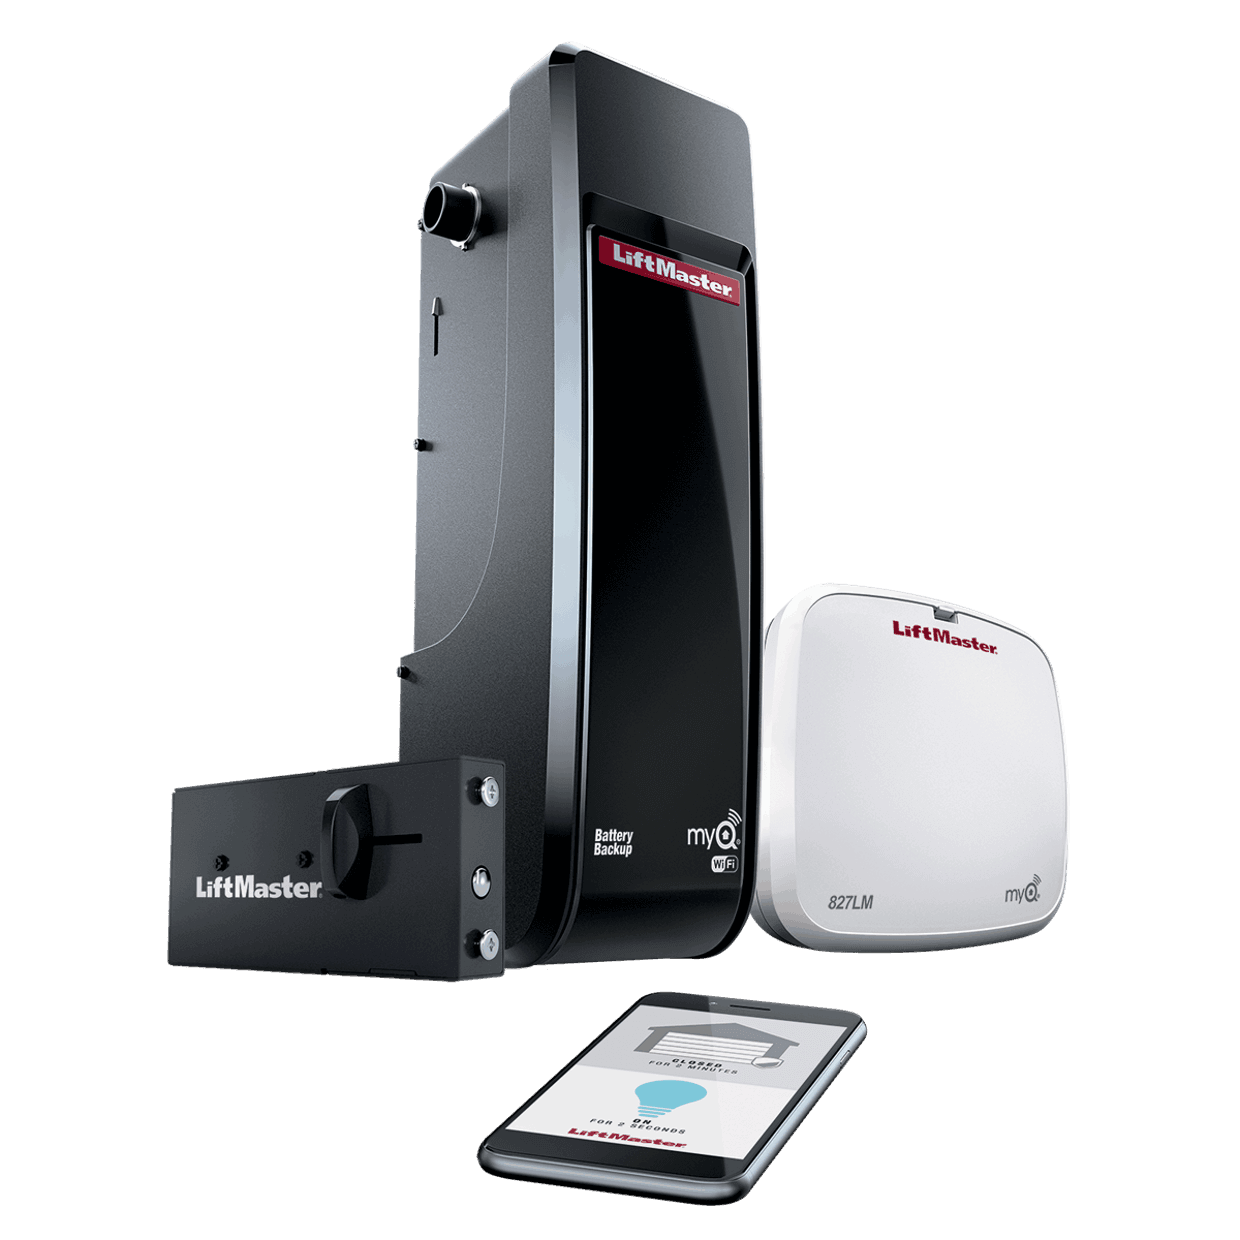
Prepare the LiftMaster or Chamberlain Opener
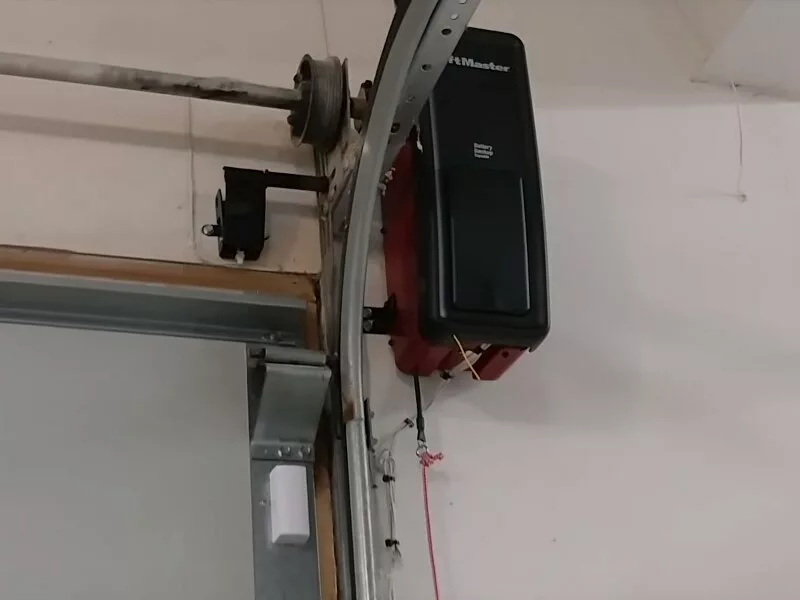
Put your garage door opener on the floor about 10 feet away from the garage door
The minimum required distance between your garage door and your opener to operate correctly is equal to the highest of your garage door. Without proper spacing, a garage door will not fully open when you complete installation.
Prepare the Genie Opener
Unbox your opener and check for the following list of componets:
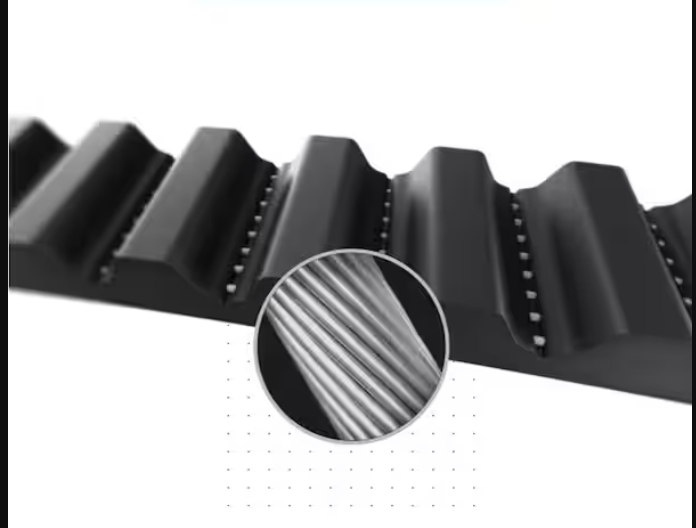
Motor, Drive mechanism: Belt or chain, The Trolley, Rails, Tool Kit, bolts, rings and nuts, hanging brackets, Remote control, Keypad, Backup-Battery: It may or may not be included depending on your opener model, Wall-mounted control, Safety sensors: It may or may not be included depending on your opener model, Emergency release, And most importantly your Manual Instuctions.
Assemble the Rail Sections
LiftMaster & Chamberlain Opener Rail Sections Assembly
Start by unpacking the rail sections and laying them out between your opener and garage door.
Start from your garage door to insert the untapered end of the first rail section into the end of the second rail section. The two sections should have a snug fit.
Slide the two tapered ends of the sections together some openers come with bolts and nuts to secure the two sections together.
Continue to add all other included rail sections.
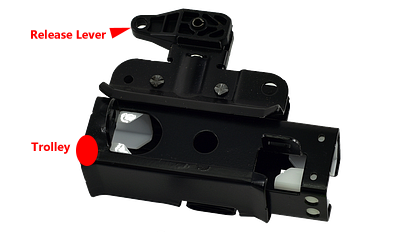
Once all rail sections are securely fastened together, slide the trolley assembly to the motor direction end of the rail. release lever should be toward the motor direction.

Install the stop bolts in the first rail section that closest to the motor.

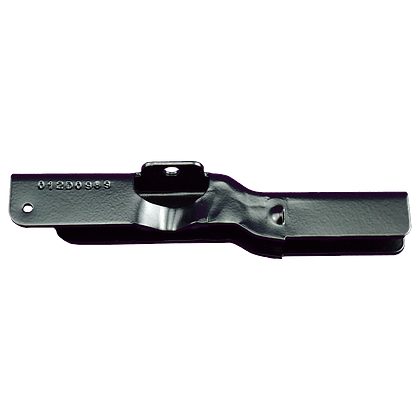
Put the U-Bracket to the motor end of the rail and tighten the bolts.


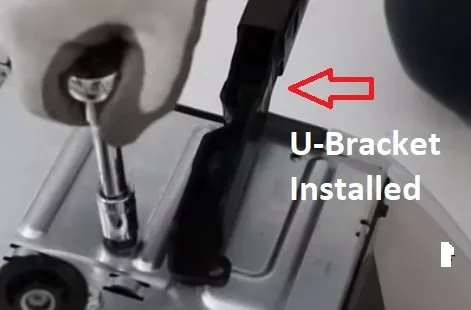
Attach the rail from the U-Bracket end to the motor unit of the garage door opener by removing the bolts from the opener with your proper size socket wrench and hand-tighten the bolts.
Make sure the rail is level and securely attached to the motor unit but don’t over-tighten the bolts or use power tools.
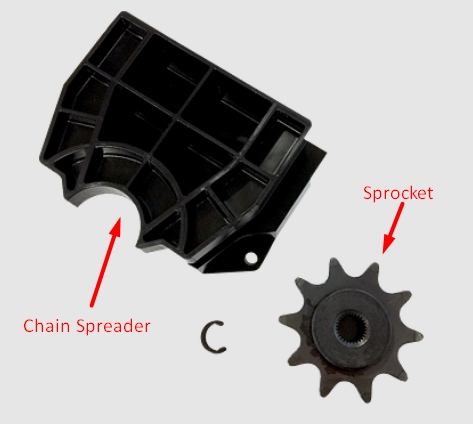
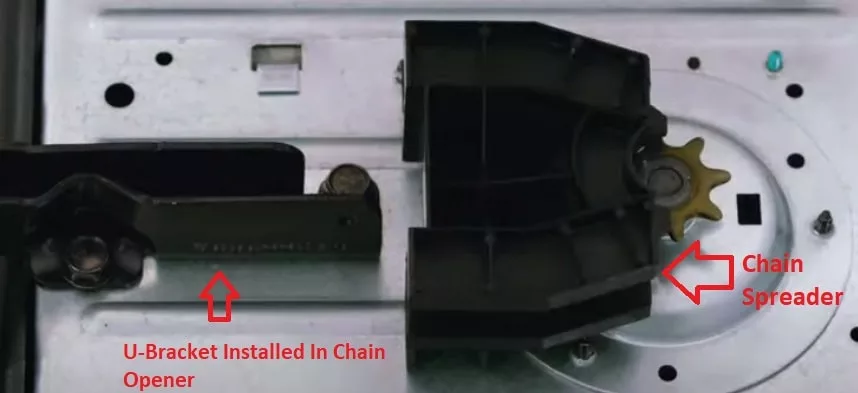
For Chain Opener Attach Chain Spreader to the motor with the included screws.

Genie Opener Rail Sections Assembly
Assemble the RAIL Sections
Start with the first rail section that have a Caution stricker and tringle hole on it.
This Rail section is for your idel wheel and the one that facing your garage door.
Put your idel wheel in the tringle hole of the first rail section and secure it with the cotter pin.
Put the nut and bolt in the hole for the carriage stop, then Slide the carriage in the first rail section.
Continue to add all other included rail sections.
Slide the drive gear assembly. this drive gear will be slided down in the motor spline to move the belt.
Assemble the Belt or Chain
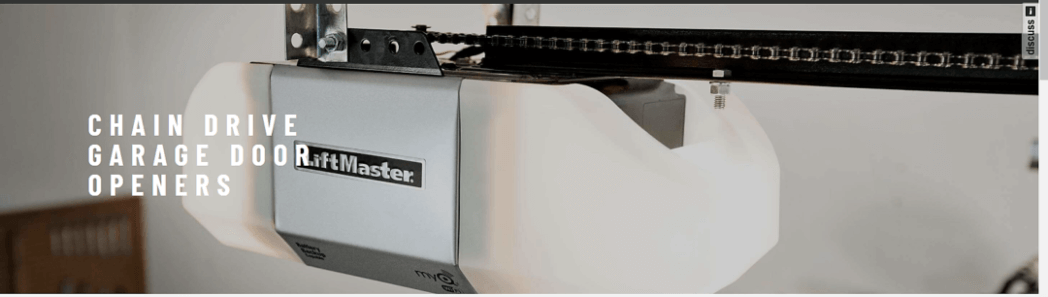
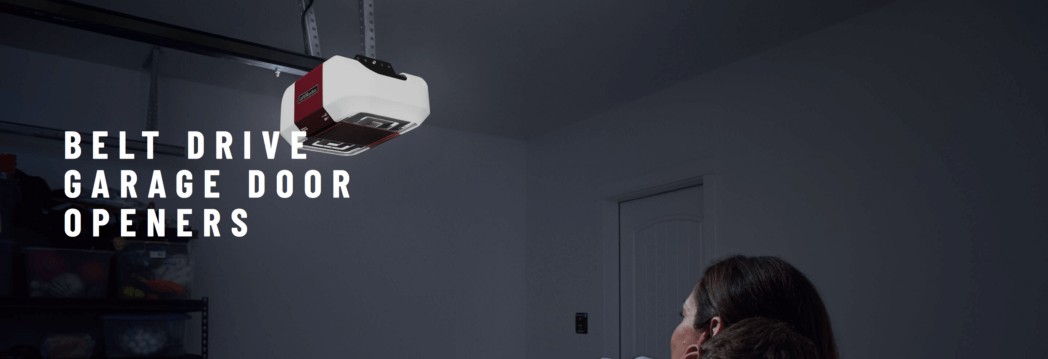
Assemble the Belt or Chain For Chamberlain & LiftMaster Openers
From the garage door start of your rail sections slide the belt or the chain cable and center position the Idler Pulley with the included hardware by the socket wrench.

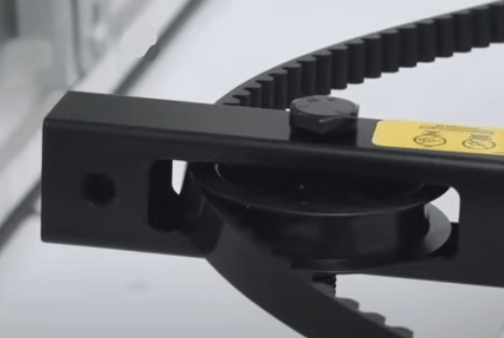
Make sure the Belt or Chain are around the Idler Pulley.
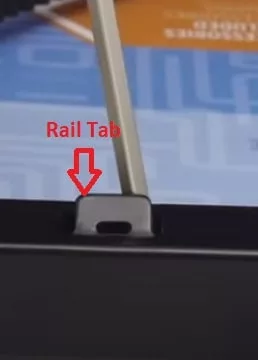
Use the screwdriver to cutout the rail tab to 90 deg angle.

Connect the belt to the trolley or chain to the trolley using the clip-type master link.
Insert the screwdriver into the second hole of the motor end of the rail section.
Extend the other side of the Belt or Chain until the trolley rest agenist the screwdriver.
For Chain Opener extend the chain and wrap it around the sprocket on the opener.
For Belt Opener Hook the belt into the trolley and wrap it around the sprocket on the opener, then install the Sprocket Cover.
Make sure the belt or chain teeth are facing the sprocket.
Connect the belt or chain with the master link hardware.
Connect the belt or chain through the threaded shaft with the master link hardware.
Assemble the belt for Genie Openers
Your Genie garage door opener belt should have a two sides one is silver and the other is gold.
Put the gold side through the idel wheel and the carriage.
Make sure the belt teeth facing the idel wheel.
connect the Turnbuckle on the both belt sides ( Silver & Gold ).
Make sure to put Turnbuckle side that it says DOOR To the gold side of the belt.
Tighten it untill your belt get the proper tension. As Manual Instuctions, Don’t over tighten the belt but you should get about a quarter inch slack on the opside side of the belt.
Tighten up the silver & gold side nuts using your adjustable wrench.
Now slide down the drive gear to the motor spline under your motor and tighten the 4 screws, two for the drive gear and 2 beside each side of the belt. Don’t Use A Power Tool, Use a socket wrench insteed.
Attach the spring trolley nut for the belt or inner nut and lock washer for the chain ( LiftMaster & Chamberlain Opener )
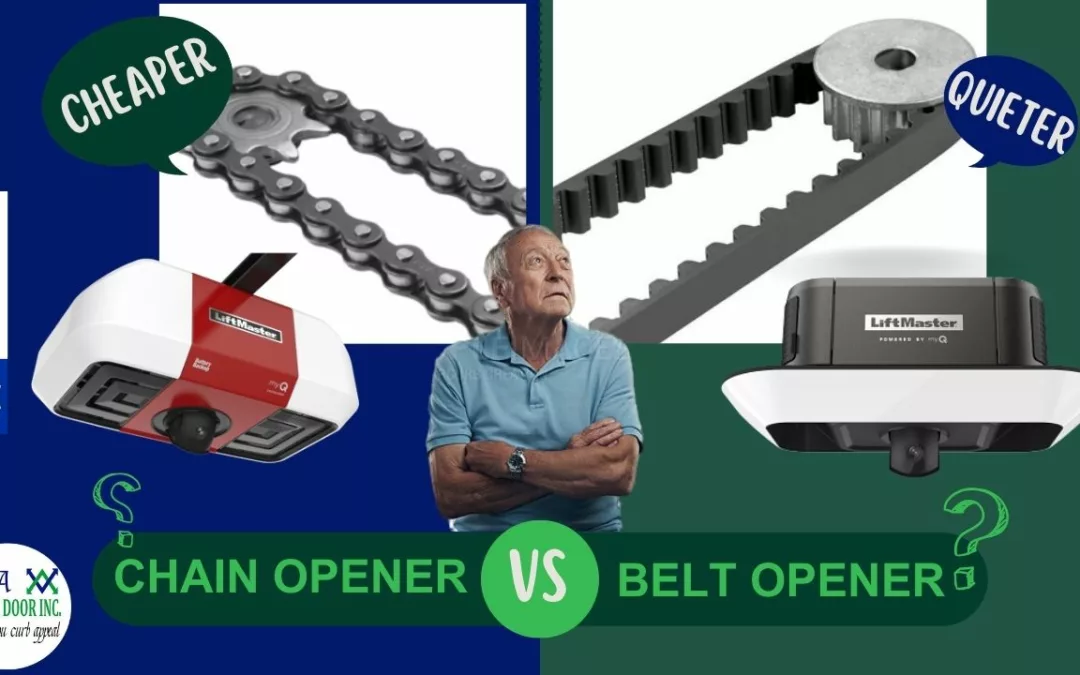
Belt openers come with a spring trolley nut that connects the belt to the opener release lever trolley but the chain opener instead of the spring trolley nut comes with an inner nut and lock washer.
Attaching the spring trolley nut for the belt opener
1- Slide the threaded shaft in the trolley hole of the release lever then attach the spring trolley nut to the threaded shaft.
2- Connect the belt to the threaded shaft using the other end of the master link hardware.
3- Use a screwdriver to push the nut ring against the trolley and with the wrench turn the spring nut until it releases the spring and snaps the nut ring to the trolley.
Attaching the inner nut and lock washer for the chain opener
1- Thread the inner nut and lock washer onto the threaded shaft.
2- Insert the threaded shaft through the hole in the trolley then Slide the outer nut onto the threaded shaft, threading it onto the shaft until it is finger-tight.
3-Use a wrench to tighten the outer nut firmly onto the shaft, ensuring it is snugly secured.
4- As manual instructions, Tighten the outer nut to tighten the chain until it is only one-quarter inch from the base on the rail
Place the header brackets
Note: As the manual suggests if you already had a header bracket in place you can use it.

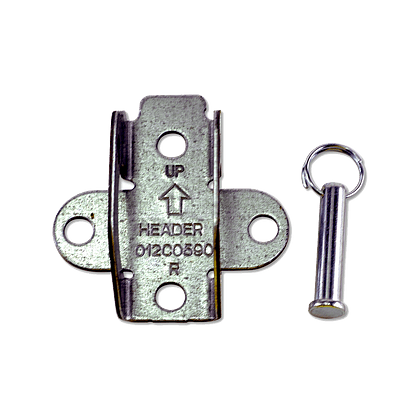
The first step in opener installation that our technicians at aaa Garage Door inc do is by installing the header brackets. which is the most important step because the header brackets are responsible to provide stability for the opener end of the rail, header brackets also help to ensure that the opener is installed at the proper height and angle above your garage door system for optimal performance. This is important because if the opener is installed too low or at the wrong angle, it can cause the door to operate improperly or even damage the door or opener.
Placing header brackets Steps
Get your stepladder.
Put a mark at the wall to the highest point that the first panel of the garage door reaches.
Close your garage door and above this mark by a minimum of 2 inches start placing the header brackets by making holes in the pilot holes using your drill.

Install the header brackets using the provided bolts with the proper size Socket Wrench.
Place the opener rail in the header brackets
Connect your garage door opener rail into the header brackets with the provided bolts or clevis pin. Note: Garage door springs should not be in touch with the header brackets or the opener rail.

Opener Hanging
Start hanging the opener in ceiling you need to prepare the perforated angle brackets (Hanging brackets & Support brackets ).
The support perforated angle support bracket will be installed in your ceiling
The hanging perforated angle brackets typically be included with the garage door opener package and will be used to hang the opener in the support bracket.
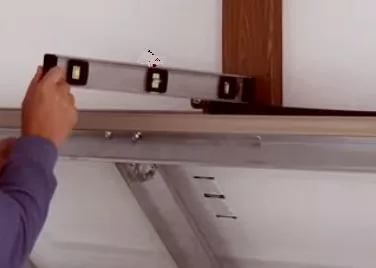
Install the support perforated angle brackets
Mark the location of the screw holes on the garage ceiling, and then use a drill to create pilot holes. Attach the support brackets using screws and bolts.
An expert technique that our technicians follow is when installing a garage door opener, it is generally recommended to install the support brackets to hang the opener on a place of studs for optimal support and stability.
In case of these studs are not exposed due to the garage door being enclosed with the Ceiling Drywall, so we use the studs finder device which is a device that helps to locate the studs using electronic sensors or magnets.
Install the hanging perforated angle brackets
Measure the distance between the support perforated angle brackets and the opener.
Open your garage door and put a wood piece under the opener rail, while the opener is mounted on your garage door you need to measure the proper distance between the support brackets and the opener.
Measure the hanging perforated angle brackets and cut to the measured distance.
Connect the hanging, support brackets and opener
Connect the hanging brackets to the support brackets then connect the opener to the hanging brackets.
Remove the wooden piece under your garage door opener rail and close your garage door.
Finalize The Opener Hanging
Remove the wooden piece under your garage door opener rail.
Close your garage door.
Install the emergency release rope to the trolley. As Manual instructions, Make sure the emergency release rope is at least 6 feet off the ground.
Install the opener lightbulbs.
Installing the Garage Door Opener Arms ( Curved Arm & Straight Arm)
Disconnect the emergency release handle then Slide the trolley to the garage door.
In general, the Horizontal & vertical reinforcement brace should be already installed on your garage door.
If your garage door doesn’t have the operator reinforcement vertical brace please contact your contractor.
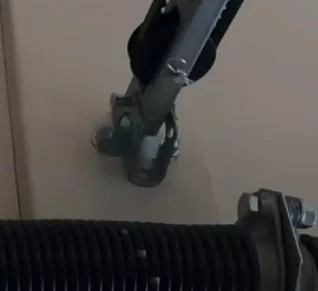
Installing the Curved Arm
If your door bracket is not already installed do the following
find the Door Bracket in your opener package.
Install the door bracket by using a drill to create pilot holes. As Manual instructions, The Door bracket should be centered under the header brackets.
Connect the Curved Arm to the Door Bracket with the provided bolt and ring. Pro Tip: Don’t attach your door bracket directly to your garage door. you have to make sure your door has an opener vertical reinforcement brace. This reinforcement brace works as force distribution to the pulling & pushing force of your opener to prevent dent or damage to your garage door panel over time.
Installing The Straight Arm
Connect the Straight Arm to the Trolley with the provided bolt and ring then connect the Straight Arm to the Curved Arm with the bolts and nut using the Socket wrench.
Programming The Down Travel Limits
Pull back the emergency release rope.
Open your garage door until the Trolley engages and clicks in place.
Opener That Has a UP/Down travel limit adjustment screw.
Do The Following
Locate the down travel limit adjustment screw on the garage door opener. This is typically located on the side or bottom of the opener motor.
Using a flathead screwdriver, turn the down travel limit screw clockwise to decrease the distance the door travels downwards, or counterclockwise to increase the distance.
Test the door by closing it and observing its travel. If the door stops at the desired location, the down travel limit is correctly set. If the door continues to travel downwards or stops too high, adjust the down travel limit screw accordingly and test again.
Opener That Have A UP/DOWN Limit Adjustment Buttons.
Do The Following
Close your garage door if it’s already open
Press and Hold the “Adjustment” button on the garage door opener until the UP Button Flashing.
Press and Hold the “Up” button on until the the door is fully opened to the desired location. Then Press & Relase the “Adjustment” Buton.
Press and Hold the “Down” button until the the door is fully closed to the desired location. Then Press & Relase the “Adjustment” Buton.
Press and RELASE the “Up” button until the the door is fully opened.
Press and RELASE the “Down” button until the the door is fully closed.
The travel limit is set correctly
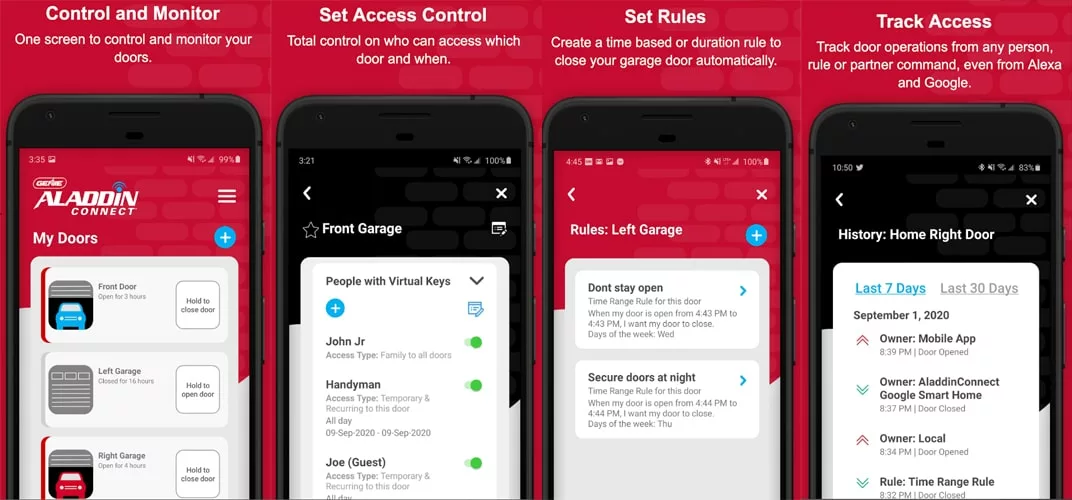
Once the travel limit is set correctly, ensure that the safety features of the garage door opener, such as the Safety sensors and auto-reverse mechanism, are functioning properly to prevent accidents or damage. In the next steps, we will give you the steps in installing the safety reverse sensor then testing it.
Install the safety reverse sensors
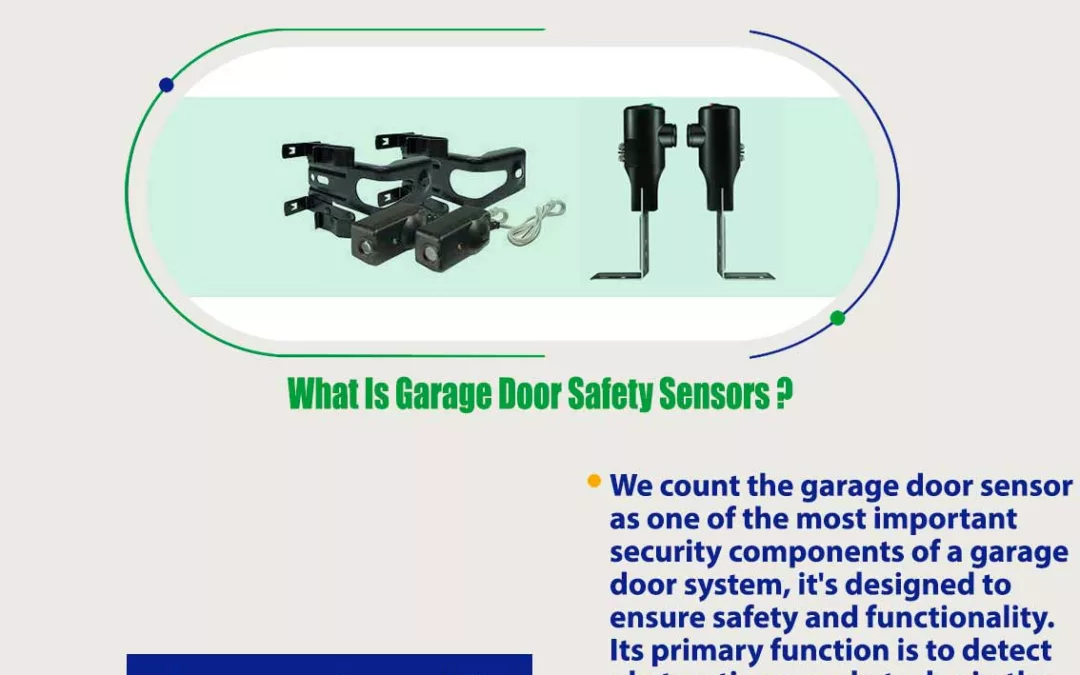
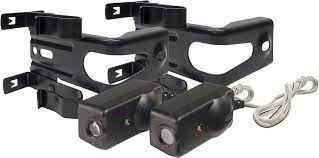
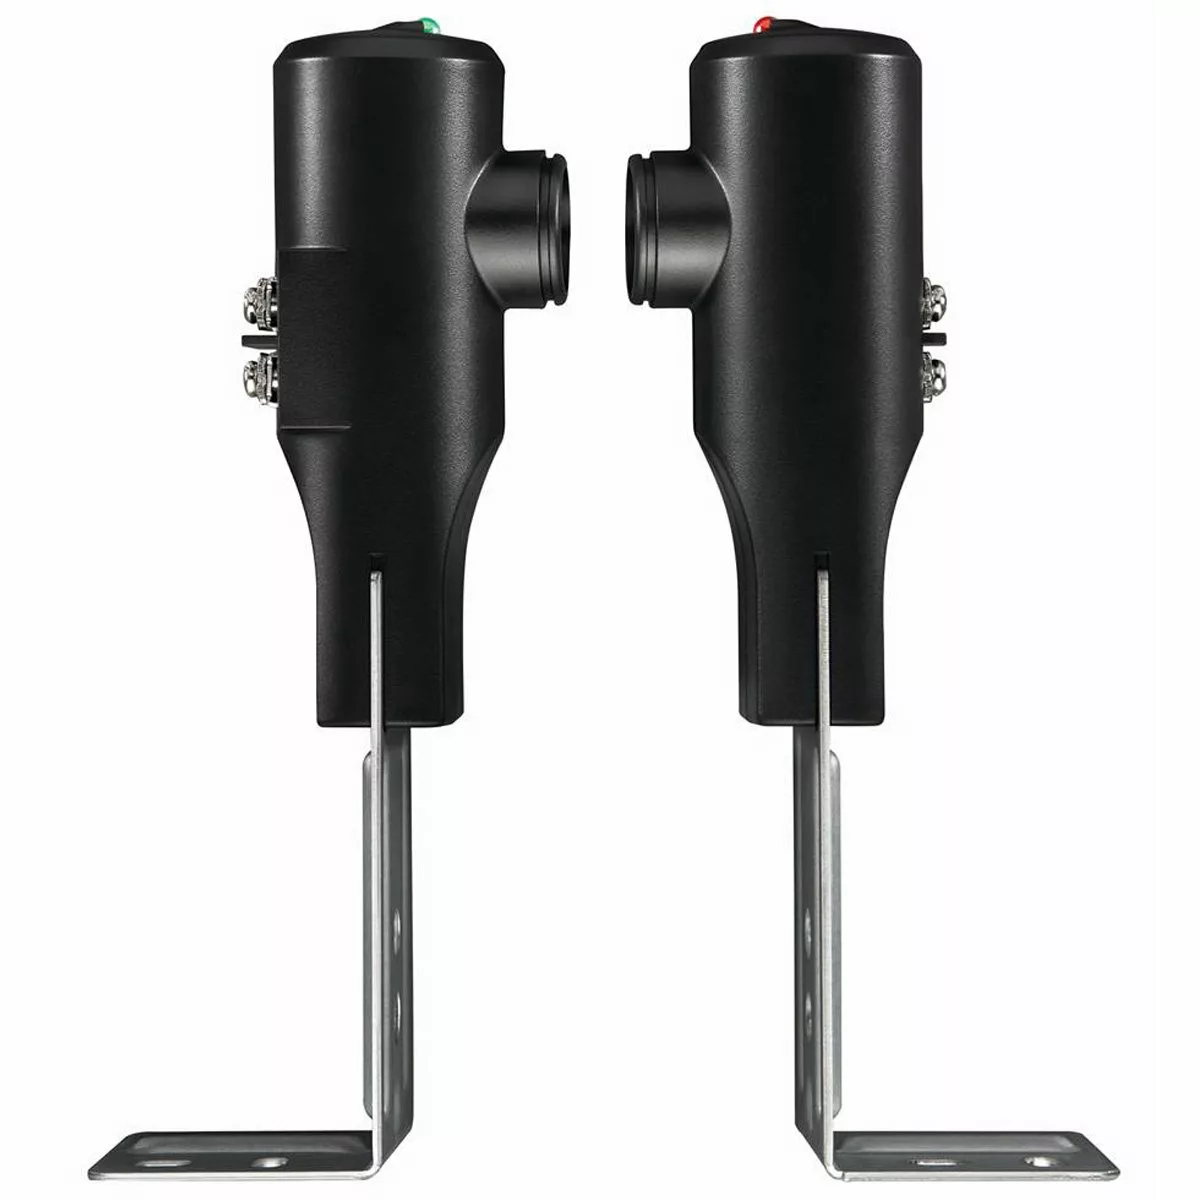
Locate the sensor mounting brackets that came with your safety sensor kit. These brackets will be used to mount the sensors to the garage door track.
Position the mounting brackets on each side of the garage door track, approximately 6 inches above the floor.
Use a measuring tape to ensure that both brackets are at the same height.
Snap the brackets to the garage door track. Make sure that the brackets are firmly secured.
mount the safety sensors to the mounting brackets using the provided bolts. Ensure that the sensors are level and facing each other.
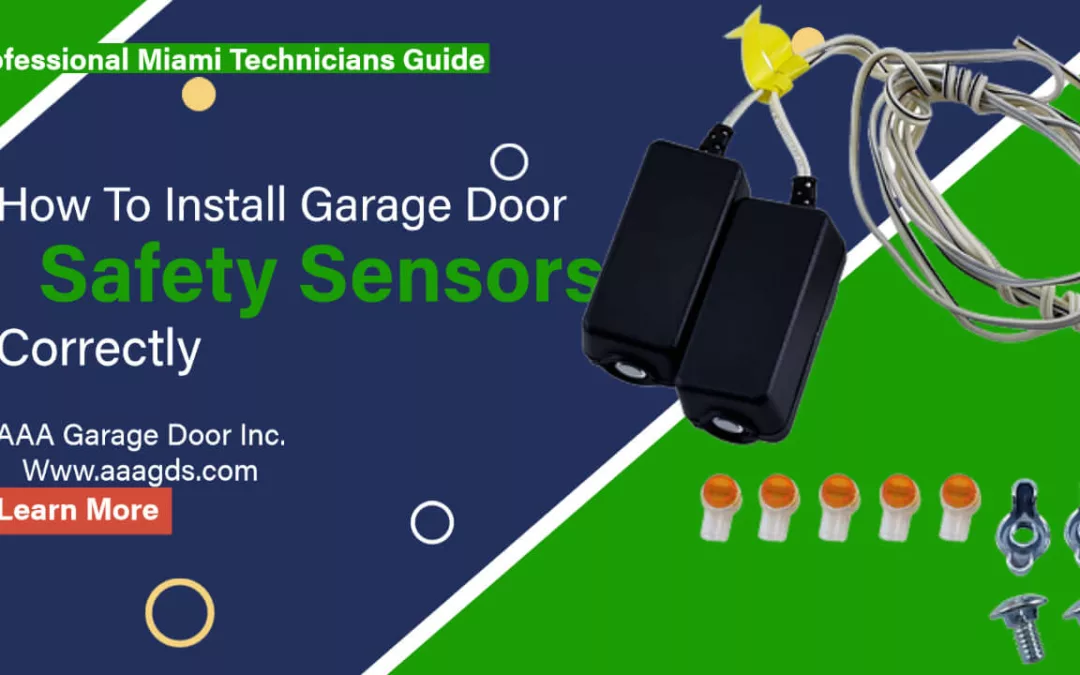
Connect the wires from the safety sensors to the garage door opener. Follow the manual instructions that came with your safety sensor kit to correctly route the safety sensor wires.
If these instructions are not enough you can read our full safety sensors installation steps and guide.
Testing the safety reverse sensors
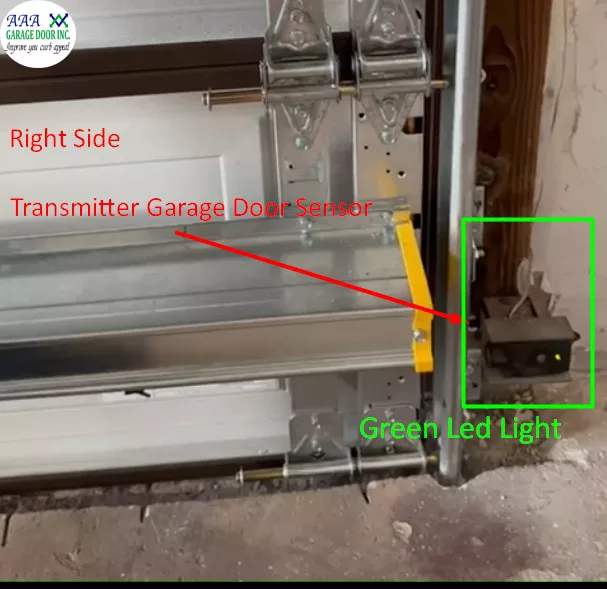
Put an object in front of the sensors to check if they detect the obstruction and reverse the door’s motion.
If the safety sensors are working correctly, the garage door will stop and reverse its motion. If the safety sensors are not working correctly or led is flickering, adjust their position or angle until the led lighting is still.
As the Manual Instruction, The Safety Reverse sensors Must be tested every month or after any adjustments are made.
This Guide Is following the demonstrated Instructions for assembling and Installing a Belt/Chain Drive Garage Door Opener at the official Chamberlain Support & Genie Youtube Channel as well as the manufacturer’s Instructions Manuals.
AAA Garage Door Inc. Ready For Your Next Garage Door Installation
Our Pro-tips & techniques provided in the process are not present in the manufacture Instructions Manual but are reflected in our technician’s years of experience, which is only followed to enhance installation safety & reliability usage of the product and does not override the warranty guidelines. Feel Free to not use any of the included pro tips or techniques. Feel free to comment for any consideration to the installation process.
You found that this DIY project is not for you, so why not leave this to our professional technicians? if you are living in Miami Dade or Broward counties AAA Garage Door Inc. is here to help you with your garage door opener installation with the most professional services and including a service warranty to rest sure that our services are completely for your satisfaction. AAA Garage Door INC. Is your local LiftMaster authorized dealer in Miami which gives you the confidence of purchasing the needed opener for you and the proper professional installation. Call us now at 305-702-0113
by Adam | Nov 19, 2022 | Garage Door Opener, Garage Door Opener Accesories
Your garage door keypad not working is a nuisance, as well as a safety concern. Since you can’t leave your garage door open or use your garage door opener, you are pretty much stuck inside. The good news is that you can your Fix Garage Door Keypad by yourself, with a little effort and a few tools. Based on my years of experience in the garage door repair business, these are the most common issues that you are likely to encounter, and how to fix them.
1- Garage door keypad battery checking
it’s also probably not just a matter of needing new batteries. but why not check if your keypad battery is already alive or dead? You can test it by opening it up and pressing one of the buttons. Most of these keypads are backlit, so pressing one of the buttons will light up behind, and if that number lights up, it’s probably a pretty good indication that it’s not the battery but if it does not light up so follow these steps to replace your garage door keypad battery.
1- Try to remove the keypad Battery cover by unscrewing the screw.
2- Remove the battery probably you will find that the electrode is snapped off or the battery just expired.
3- get a replacement for this battery with a new one
Time to try your keypad if it’s working now or not.
2- Reboot & Reset the garage door opener
if you replaced the battery but still your keypad doesn’t work so you probably need to reboot & reset the garage door opener. Garage door openers sometimes get stuck while working for long periods of time it’s not common to happen especially with new versions of openers but it is worth sometimes doing the most popular ways to fix issues. In another hand resetting your garage door opener will probably fix the signals that could possibly interfere with your opener and the keypad with other devices in your home because the connection between your garage door opener and the keypad is linked by a wireless connection or dual-frequency radio operates the keypad after you key in a personally selected four-digit pin. so resetting this connection could fix the issue
Steps to reboot & Reset the garage door opener
1. Unplug the garage door opener from the power outlet.
2. Wait a few seconds, then plug it back in.
3. Reseting your keypad pin may be different for each model but to do this, you will need to find the “learn” button on the opener itself. Once you have located this button, press and hold it for approximately six seconds. Next, enter a four-digit code of your choice on the keypad. Once you have done this, the opener should be reprogrammed and should start working again. You might need to read HOW TO PROGRAM YOUR GARAGE DOOR REMOTE CONTROL
4. Try using the garage door opener again.
Still lost and don’t know how to rest your garage door opener it’s okay we got you the most top opener brands explaining how to do it. Liftmaster, Genie.
3- Check for Frayed Wiring
if rebooting and resetting the garage door opener doesn’t fix the problem, then now we may have frayed wiring inside the keypad which causes the keys not to respond. so we should check the keypad from the inside by uncovering the back cover of the keypad then looking at any loose connections or damaged wires, then Inspecting the keys to make sure the wires are well-connected. if you found any wires are not connected or are damaged try to connect them properly. remember that this issue happens regularly as a result of wearing out or the weather conditions in your area.
4- Stuck keys
Perhaps some of the buttons are stuck or it is possible that they have been damaged over time, so you can verify that if it is correct by putting in a pin code completely different from the previous pin code, so if the garage door opens, then the keypad has damaged some of the buttons in it.
5- Replacement of your keypad
So if you’ve gone through all of those steps you’ve replaced the battery you’ve changed the passcode and you’ve relearned the keypad to the garage door opener and it still isn’t working then more than likely the keypad just is not good anymore and you’re going to have to replace it. Here are Some Best Keypad Replacement options for your Residential Garage Door Opener.
The good news is this is a pretty easy and cheap fix you can buy and replace it by yourself or call the professionals to diagnose and fix the problem. Hire AAA GARAGE DOOR INC. if you are a resident of Miami-Dade or Broward county for any issues with your keypad. We offer installation, maintenance, and repair services to our clients.
