Installing a garage door opener correctly is essential to ensure your safety and the functionality of your garage and with the right tools and instructions, you can easily complete this DIY project in just a few hours.
Once you’ve completed the installation, you’ll enjoy the convenience of a fully functioning garage door opener, giving you peace of mind and freeing up time for more important things in life. So why not take the first step towards a safer and more convenient garage by learning how to properly install a garage door opener today?
Pre-Installation Checklist
Make sure your garage ceiling is finished and dry
It is important to ensure your garage ceiling is finished and dry before installing a garage door opener. This is because installing a garage door opener involves drilling holes into the ceiling, and if the ceiling is not finished or is damp, it can cause the drywall or plaster to crumble and break apart. This can not only make the installation more difficult but can also create a safety hazard. If you are unsure about the condition of your garage ceiling, it’s best to consult with a professional before attempting to install the garage door opener. A professional can assess the condition of your ceiling and advise you on the best course of action to take to ensure a safe and successful installation.
Check the balance of the garage door
check the balance of your garage door, you have to lift the door three to four feet off the ground and release the door. if your garage door is properly balanced your garage door should be closed smoothly if your garage door is out of balance, you will see that it will be slammed on the floor. To probably balance your garage door you can check out our blog on balancing garage doors in easy and safe steps.
Measure the height of your garage door
It’s important to measure the door height because most garage openers are provided with a rail designed for a seven-foot, and up to Ten feet tall garage doors, otherwise, you need to buy a rail extension kit.
It’s important to note that this guide is for demonstration purposes only and these specific steps may vary slightly depending on the manufacturer’s instructions for your particular garage door opener. Always consult the manufacturer’s instructions manual if you found parts missing or not mentioned and follow them carefully to ensure a safe and successful installation. If you lost your manufacturer’s manual please contact your local contractor.
Your Pre-installation checklist is complete. Make sure to close your garage door afterward.
Prepare the LiftMaster or Chamberlain Opener
Put your garage door opener on the floor about 10 feet away from the garage door
The minimum required distance between your garage door and your opener to operate correctly is equal to the highest of your garage door. Without proper spacing, a garage door will not fully open when you complete installation.
Prepare the Genie Opener
Unbox your opener and check for the following list of componets:
Motor, Drive mechanism: Belt or chain, The Trolley, Rails, Tool Kit, bolts, rings and nuts, hanging brackets, Remote control, Keypad, Backup-Battery: It may or may not be included depending on your opener model, Wall-mounted control, Safety sensors: It may or may not be included depending on your opener model, Emergency release, And most importantly your Manual Instuctions.
[/dipl_how_to_schema_item][dipl_how_to_schema_item step_title=”Assemble the Rail Sections” _builder_version=”4.20.4″ _module_preset=”default” step_heading_level=”h2″ step_heading_font=”|800|||||||” global_colors_info=”{}” theme_builder_area=”post_content”]
LiftMaster & Chamberlain Opener Rail Sections Assembly
Start by unpacking the rail sections and laying them out between your opener and garage door.
Start from your garage door to insert the untapered end of the first rail section into the end of the second rail section. The two sections should have a snug fit.
Slide the two tapered ends of the sections together some openers come with bolts and nuts to secure the two sections together.
Continue to add all other included rail sections.
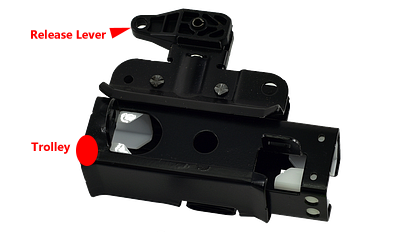
Once all rail sections are securely fastened together, slide the trolley assembly to the motor direction end of the rail. release lever should be toward the motor direction.
Install the stop bolts in the first rail section that closest to the motor.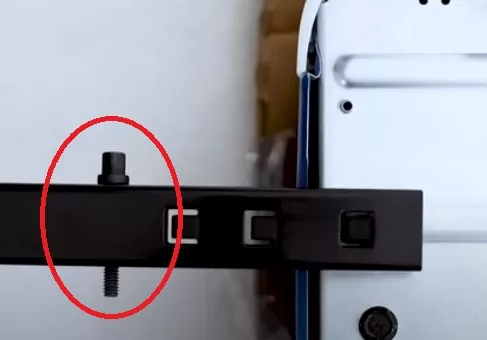
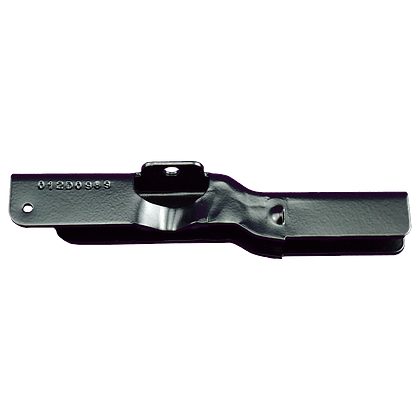
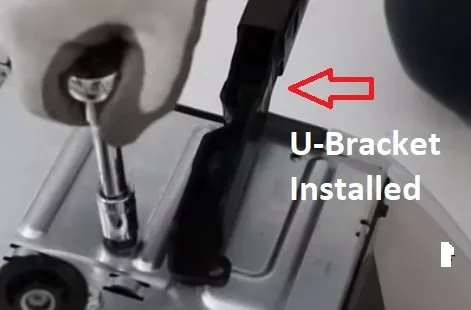
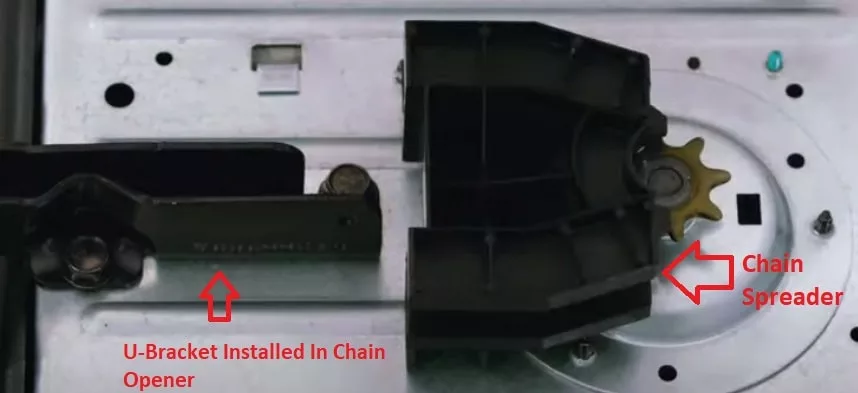
Put the U-Bracket to the motor end of the rail and tighten the bolts.
Attach the rail from the U-Bracket end to the motor unit of the garage door opener by removing the bolts from the opener with your proper size socket wrench and hand-tighten the bolts.
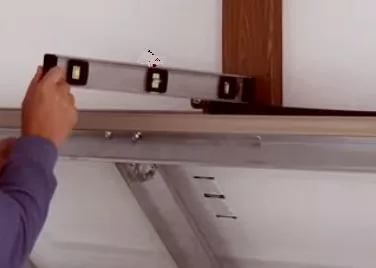
Make sure the rail is level and securely attached to the motor unit but don’t over-tighten the bolts or use power tools.
For Chain Opener Attach Chain Spreader to the motor with the included screws.
Genie Opener Rail Sections Assembly
Assemble the RAIL Sections
Start with the first rail section that have a Caution stricker and tringle hole on it.
This Rail section is for your idel wheel and the one that facing your garage door.
Put your idel wheel in the tringle hole of the first rail section and secure it with the cotter pin.
Put the nut and bolt in the hole for the carriage stop, then Slide the carriage in the first rail section.
Continue to add all other included rail sections.
Slide the drive gear assembly. this drive gear will be slided down in the motor spline to move the belt.
[/dipl_how_to_schema_item][dipl_how_to_schema_item step_title=”Assemble the Belt or Chain” _builder_version=”4.20.4″ _module_preset=”default” step_heading_level=”h2″ step_heading_font=”|800|||||||” global_colors_info=”{}” theme_builder_area=”post_content”]
Assemble the Belt or Chain For Chamberlain & LiftMaster Openers
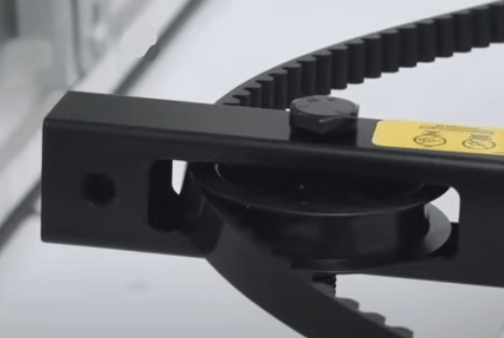
From the garage door start of your rail sections slide the belt or the chain cable and center position the Idler Pulley with the included hardware by the socket wrench.
Make sure the Belt or Chain are around the Idler Pulley.
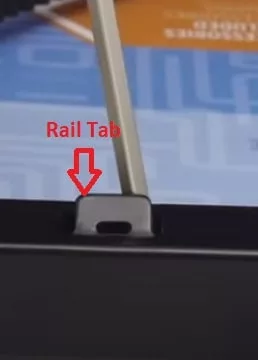
Use the screwdriver to cutout the rail tab to 90 deg angle.
Connect the belt to the trolley or chain to the trolley using the clip-type master link.
Insert the screwdriver into the second hole of the motor end of the rail section.
Extend the other side of the Belt or Chain until the trolley rest agenist the screwdriver.
For Chain Opener extend the chain and wrap it around the sprocket on the opener.
For Belt Opener Hook the belt into the trolley and wrap it around the sprocket on the opener, then install the Sprocket Cover.
Make sure the belt or chain teeth are facing the sprocket.
Connect the belt or chain with the master link hardware.
Connect the belt or chain through the threaded shaft with the master link hardware.
Assemble the belt for Genie Openers
Your Genie garage door opener belt should have a two sides one is silver and the other is gold.
Put the gold side through the idel wheel and the carriage.
Make sure the belt teeth facing the idel wheel.
connect the Turnbuckle on the both belt sides ( Silver & Gold ).
Make sure to put Turnbuckle side that it says DOOR To the gold side of the belt.
Tighten it untill your belt get the proper tension. As Manual Instuctions, Don’t over tighten the belt but you should get about a quarter inch slack on the opside side of the belt.
Tighten up the silver & gold side nuts using your adjustable wrench.
Now slide down the drive gear to the motor spline under your motor and tighten the 4 screws, two for the drive gear and 2 beside each side of the belt. Don’t Use A Power Tool, Use a socket wrench insteed.
[/dipl_how_to_schema_item][dipl_how_to_schema_item step_title=”Attach the spring trolley nut for the belt or inner nut and lock washer for the chain ( LiftMaster & Chamberlain Opener )” _builder_version=”4.20.4″ _module_preset=”default” step_heading_level=”h2″ step_heading_font=”|800|||||||” step_heading_text_color=”#0C71C3″ global_colors_info=”{}” theme_builder_area=”post_content”]
Belt openers come with a spring trolley nut that connects the belt to the opener release lever trolley but the chain opener instead of the spring trolley nut comes with an inner nut and lock washer.
Attaching the spring trolley nut for the belt opener
1- Slide the threaded shaft in the trolley hole of the release lever then attach the spring trolley nut to the threaded shaft.
2- Connect the belt to the threaded shaft using the other end of the master link hardware.
3- Use a screwdriver to push the nut ring against the trolley and with the wrench turn the spring nut until it releases the spring and snaps the nut ring to the trolley.
Attaching the inner nut and lock washer for the chain opener
1- Thread the inner nut and lock washer onto the threaded shaft.
2- Insert the threaded shaft through the hole in the trolley then Slide the outer nut onto the threaded shaft, threading it onto the shaft until it is finger-tight.
3-Use a wrench to tighten the outer nut firmly onto the shaft, ensuring it is snugly secured.
4- As manual instructions, Tighten the outer nut to tighten the chain until it is only one-quarter inch from the base on the rail
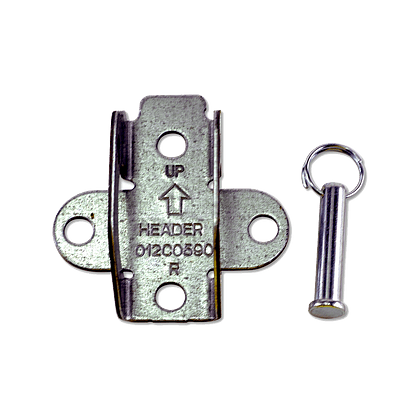
[/dipl_how_to_schema_item][dipl_how_to_schema_item step_title=”Place the header brackets” _builder_version=”4.20.4″ _module_preset=”default” step_heading_level=”h2″ step_heading_font=”|800|||||||” global_colors_info=”{}” theme_builder_area=”post_content”]
Note: As the manual suggests if you already had a header bracket in place you can use it.
The first step in opener installation that our technicians at aaa Garage Door inc do is by installing the header brackets. which is the most important step because the header brackets are responsible to provide stability for the opener end of the rail, header brackets also help to ensure that the opener is installed at the proper height and angle above your garage door system for optimal performance. This is important because if the opener is installed too low or at the wrong angle, it can cause the door to operate improperly or even damage the door or opener.
Placing header brackets Steps
Get your stepladder.
Put a mark at the wall to the highest point that the first panel of the garage door reaches.
Close your garage door and above this mark by a minimum of 2 inches start placing the header brackets by making holes in the pilot holes using your drill.
Install the header brackets using the provided bolts with the proper size Socket Wrench.
[/dipl_how_to_schema_item][dipl_how_to_schema_item step_title=”Place the opener rail in the header brackets” _builder_version=”4.20.4″ _module_preset=”default” step_heading_level=”h2″ step_heading_font=”|800|||||||” global_colors_info=”{}” theme_builder_area=”post_content”]
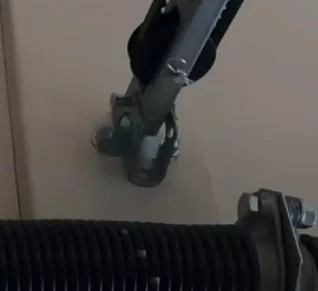
Connect your garage door opener rail into the header brackets with the provided bolts or clevis pin. Note: Garage door springs should not be in touch with the header brackets or the opener rail.
[/dipl_how_to_schema_item][dipl_how_to_schema_item step_title=”Opener Hanging” _builder_version=”4.20.4″ _module_preset=”default” step_heading_level=”h2″ step_heading_font=”|800|||||||” global_colors_info=”{}” theme_builder_area=”post_content”]
Start hanging the opener in ceiling you need to prepare the perforated angle brackets (Hanging brackets & Support brackets ).
The support perforated angle support bracket will be installed in your ceiling
The hanging perforated angle brackets typically be included with the garage door opener package and will be used to hang the opener in the support bracket.
Install the support perforated angle brackets
Mark the location of the screw holes on the garage ceiling, and then use a drill to create pilot holes. Attach the support brackets using screws and bolts.
An expert technique that our technicians follow is when installing a garage door opener, it is generally recommended to install the support brackets to hang the opener on a place of studs for optimal support and stability.
In case of these studs are not exposed due to the garage door being enclosed with the Ceiling Drywall, so we use the studs finder device which is a device that helps to locate the studs using electronic sensors or magnets.
Install the hanging perforated angle brackets
Measure the distance between the support perforated angle brackets and the opener.
Open your garage door and put a wood piece under the opener rail, while the opener is mounted on your garage door you need to measure the proper distance between the support brackets and the opener.
Measure the hanging perforated angle brackets and cut to the measured distance.
Connect the hanging, support brackets and opener
Connect the hanging brackets to the support brackets then connect the opener to the hanging brackets.
Remove the wooden piece under your garage door opener rail and close your garage door.
Finalize The Opener Hanging
Remove the wooden piece under your garage door opener rail.
Close your garage door.
Install the emergency release rope to the trolley. As Manual instructions, Make sure the emergency release rope is at least 6 feet off the ground.
Install the opener lightbulbs.
[/dipl_how_to_schema_item][dipl_how_to_schema_item step_title=”Installing the Garage Door Opener Arms ( Curved Arm & Straight Arm)” _builder_version=”4.20.4″ _module_preset=”default” step_heading_level=”h2″ step_heading_font=”|800|||||||” global_colors_info=”{}” theme_builder_area=”post_content”]
Disconnect the emergency release handle then Slide the trolley to the garage door.
In general, the Horizontal & vertical reinforcement brace should be already installed on your garage door.
If your garage door doesn’t have the operator reinforcement vertical brace please contact your contractor.
Installing the Curved Arm
If your door bracket is not already installed do the following
find the Door Bracket in your opener package.
Install the door bracket by using a drill to create pilot holes. As Manual instructions, The Door bracket should be centered under the header brackets.
Connect the Curved Arm to the Door Bracket with the provided bolt and ring. Pro Tip: Don’t attach your door bracket directly to your garage door. you have to make sure your door has an opener vertical reinforcement brace. This reinforcement brace works as force distribution to the pulling & pushing force of your opener to prevent dent or damage to your garage door panel over time.
Installing The Straight Arm
Connect the Straight Arm to the Trolley with the provided bolt and ring then connect the Straight Arm to the Curved Arm with the bolts and nut using the Socket wrench.
[/dipl_how_to_schema_item][dipl_how_to_schema_item step_title=”Programming The Down Travel Limits” _builder_version=”4.20.4″ _module_preset=”default” global_colors_info=”{}” theme_builder_area=”post_content”]
Pull back the emergency release rope.
Open your garage door until the Trolley engages and clicks in place.
Opener That Has a UP/Down travel limit adjustment screw.
Do The Following
Locate the down travel limit adjustment screw on the garage door opener. This is typically located on the side or bottom of the opener motor.
Using a flathead screwdriver, turn the down travel limit screw clockwise to decrease the distance the door travels downwards, or counterclockwise to increase the distance.
Test the door by closing it and observing its travel. If the door stops at the desired location, the down travel limit is correctly set. If the door continues to travel downwards or stops too high, adjust the down travel limit screw accordingly and test again.
Opener That Have A UP/DOWN Limit Adjustment Buttons.
Do The Following
Close your garage door if it’s already open
Press and Hold the “Adjustment” button on the garage door opener until the UP Button Flashing.
Press and Hold the “Up” button on until the the door is fully opened to the desired location. Then Press & Relase the “Adjustment” Buton.
Press and Hold the “Down” button until the the door is fully closed to the desired location. Then Press & Relase the “Adjustment” Buton.
Press and RELASE the “Up” button until the the door is fully opened.
Press and RELASE the “Down” button until the the door is fully closed.
The travel limit is set correctly
Once the travel limit is set correctly, ensure that the safety features of the garage door opener, such as the Safety sensors and auto-reverse mechanism, are functioning properly to prevent accidents or damage. In the next steps, we will give you the steps in installing the safety reverse sensor then testing it.
[/dipl_how_to_schema_item][dipl_how_to_schema_item step_title=”Install the safety reverse sensors” _builder_version=”4.21.0″ _module_preset=”default” hover_enabled=”0″ global_colors_info=”{}” theme_builder_area=”post_content” sticky_enabled=”0″]
Locate the sensor mounting brackets that came with your safety sensor kit. These brackets will be used to mount the sensors to the garage door track.
Position the mounting brackets on each side of the garage door track, approximately 6 inches above the floor.
Use a measuring tape to ensure that both brackets are at the same height.
Snap the brackets to the garage door track. Make sure that the brackets are firmly secured.
mount the safety sensors to the mounting brackets using the provided bolts. Ensure that the sensors are level and facing each other.
Connect the wires from the safety sensors to the garage door opener. Follow the manual instructions that came with your safety sensor kit to correctly route the safety sensor wires.
If these instructions are not enough you can read our full safety sensors installation steps and guide.
[/dipl_how_to_schema_item][dipl_how_to_schema_item step_title=”Testing the safety reverse sensors” _builder_version=”4.20.4″ _module_preset=”default” global_colors_info=”{}” theme_builder_area=”post_content”]
Put an object in front of the sensors to check if they detect the obstruction and reverse the door’s motion.
If the safety sensors are working correctly, the garage door will stop and reverse its motion. If the safety sensors are not working correctly or led is flickering, adjust their position or angle until the led lighting is still.
As the Manual Instruction, The Safety Reverse sensors Must be tested every month or after any adjustments are made.
[/dipl_how_to_schema_item][/dipl_how_to_schema]
This Guide Is following the demonstrated Instructions for assembling and Installing a Belt/Chain Drive Garage Door Opener at the official Chamberlain Support & Genie Youtube Channel as well as the manufacturer’s Instructions Manuals.
AAA Garage Door Inc. Ready For Your Next Garage Door Installation
Our Pro-tips & techniques provided in the process are not present in the manufacture Instructions Manual but are reflected in our technician’s years of experience, which is only followed to enhance installation safety & reliability usage of the product and does not override the warranty guidelines. Feel Free to not use any of the included pro tips or techniques. Feel free to comment for any consideration to the installation process.
You found that this DIY project is not for you, so why not leave this to our professional technicians? if you are living in Miami Dade or Broward counties AAA Garage Door Inc. is here to help you with your garage door opener installation with the most professional services and including a service warranty to rest sure that our services are completely for your satisfaction. AAA Garage Door INC. Is your local LiftMaster authorized dealer in Miami which gives you the confidence of purchasing the needed opener for you and the proper professional installation. Call us now at 305-702-0113





0 Comments